> ## Documentation Index
> Fetch the complete documentation index at: https://docs-dev.mintlify.site/llms.txt
> Use this file to discover all available pages before exploring further.
> Learn how to configure Okta as an OIDC identity provider for Cross App Access (XAA).
# Okta as OIDC IdP
export const ReleaseStageNotice = ({feature, stage, plans, contact, terms}) => {
const stageTextMap = {
"beta": "Beta",
"ea": "Early Access"
};
const stageText = stageTextMap[stage] || "a product release stage";
const prsLink = "/docs/troubleshoot/product-lifecycle/product-release-stages";
const linkify = (text, url) => {
return {text};
};
const includeDetails = (plans, contact, terms) => {
const hasDetails = terms || plans || contact;
if (!hasDetails) return null;
return
{plans && <>This feature is available for {linkify(`${plans} plans`, "https://auth0.com/pricing")}. }
{contact && "To participate, contact " + contact + ". "}
{terms && <>By using this feature, you agree to the applicable Free Trial terms in Okta's {linkify("Master Subscription Agreement", "https://www.okta.com/legal")}.}
;
};
return
The {feature} feature is in {linkify(stageText, prsLink)}.
{includeDetails(plans, contact, terms)}
;
};
This guide assumes you use Okta as your enterprise identity provider (IdP) and have administrative access to an Okta tenant you can use for testing. If you don’t have one, read [Create and configure your Okta tenant](/docs/secure/call-apis-on-users-behalf/xaa/idp/okta-as-oidc-idp#create-and-configure-your-okta-tenant).
Configure Okta as the OIDC enterprise identity provider for Cross App Access (XAA). You'll set up an Okta tenant, register the Resource and Requesting Apps in Okta, and configure a Workforce Enterprise connection that federates your Auth0 tenant with Okta.
## Create and configure your Okta tenant
To create and configure your Okta tenant for Cross App Access:
* On the [Okta Developer website](https://developer.okta.com/signup/), sign up for an **Okta Integrator Free Plan**. Once you sign up, you should be redirected to your new Okta tenant.
* If Cross App Access is not enabled in your Okta tenant, email `developers@okta.com` to request XAA enablement for your Okta tenant.
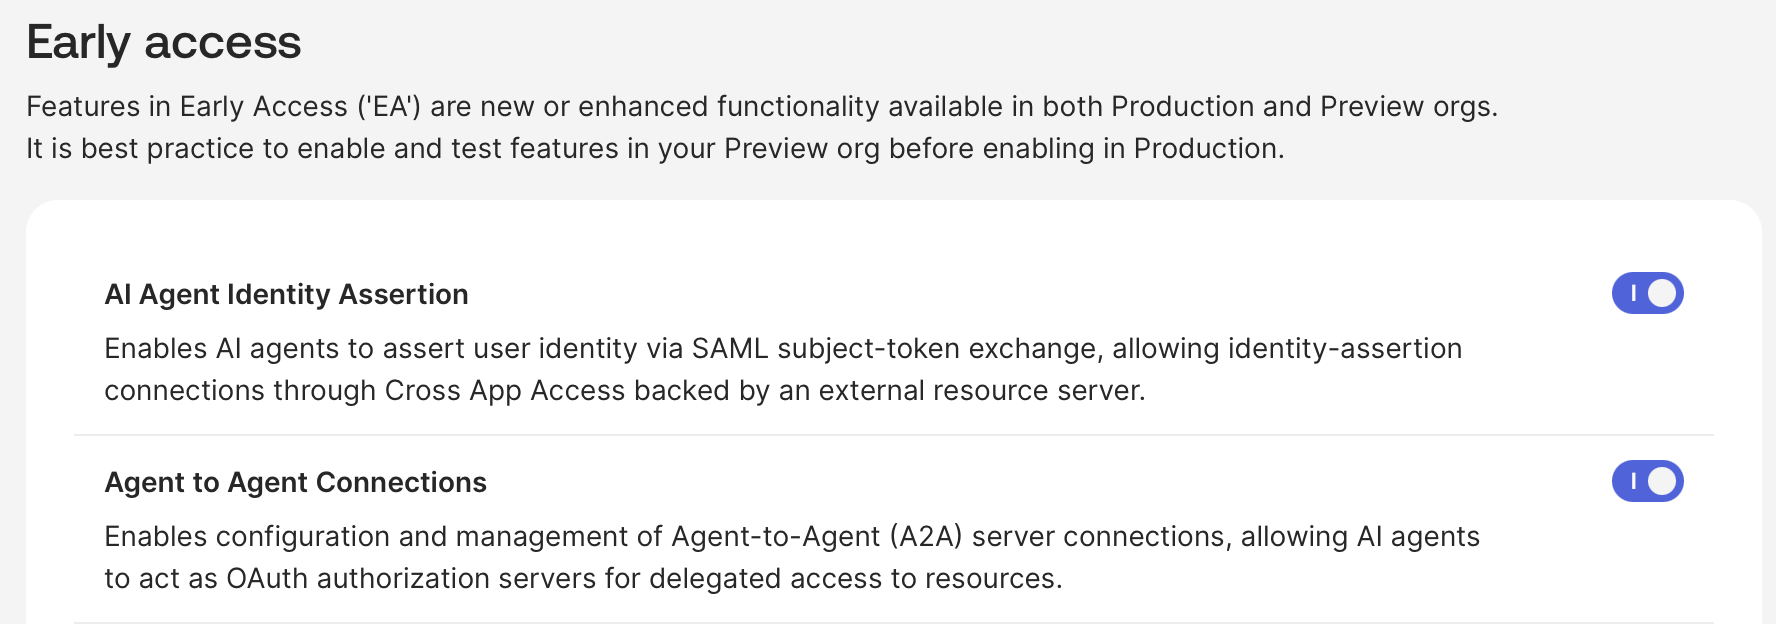
Once you've enabled Cross App Access, make sure the following features are toggled on under **Okta Admin > Settings > Features** in the Okta Admin Console.
 ## Register the Requesting App in Okta
### Create Requesting App in Okta
Your Requesting App is a standard OIDC application. To create a Requesting App in Okta:
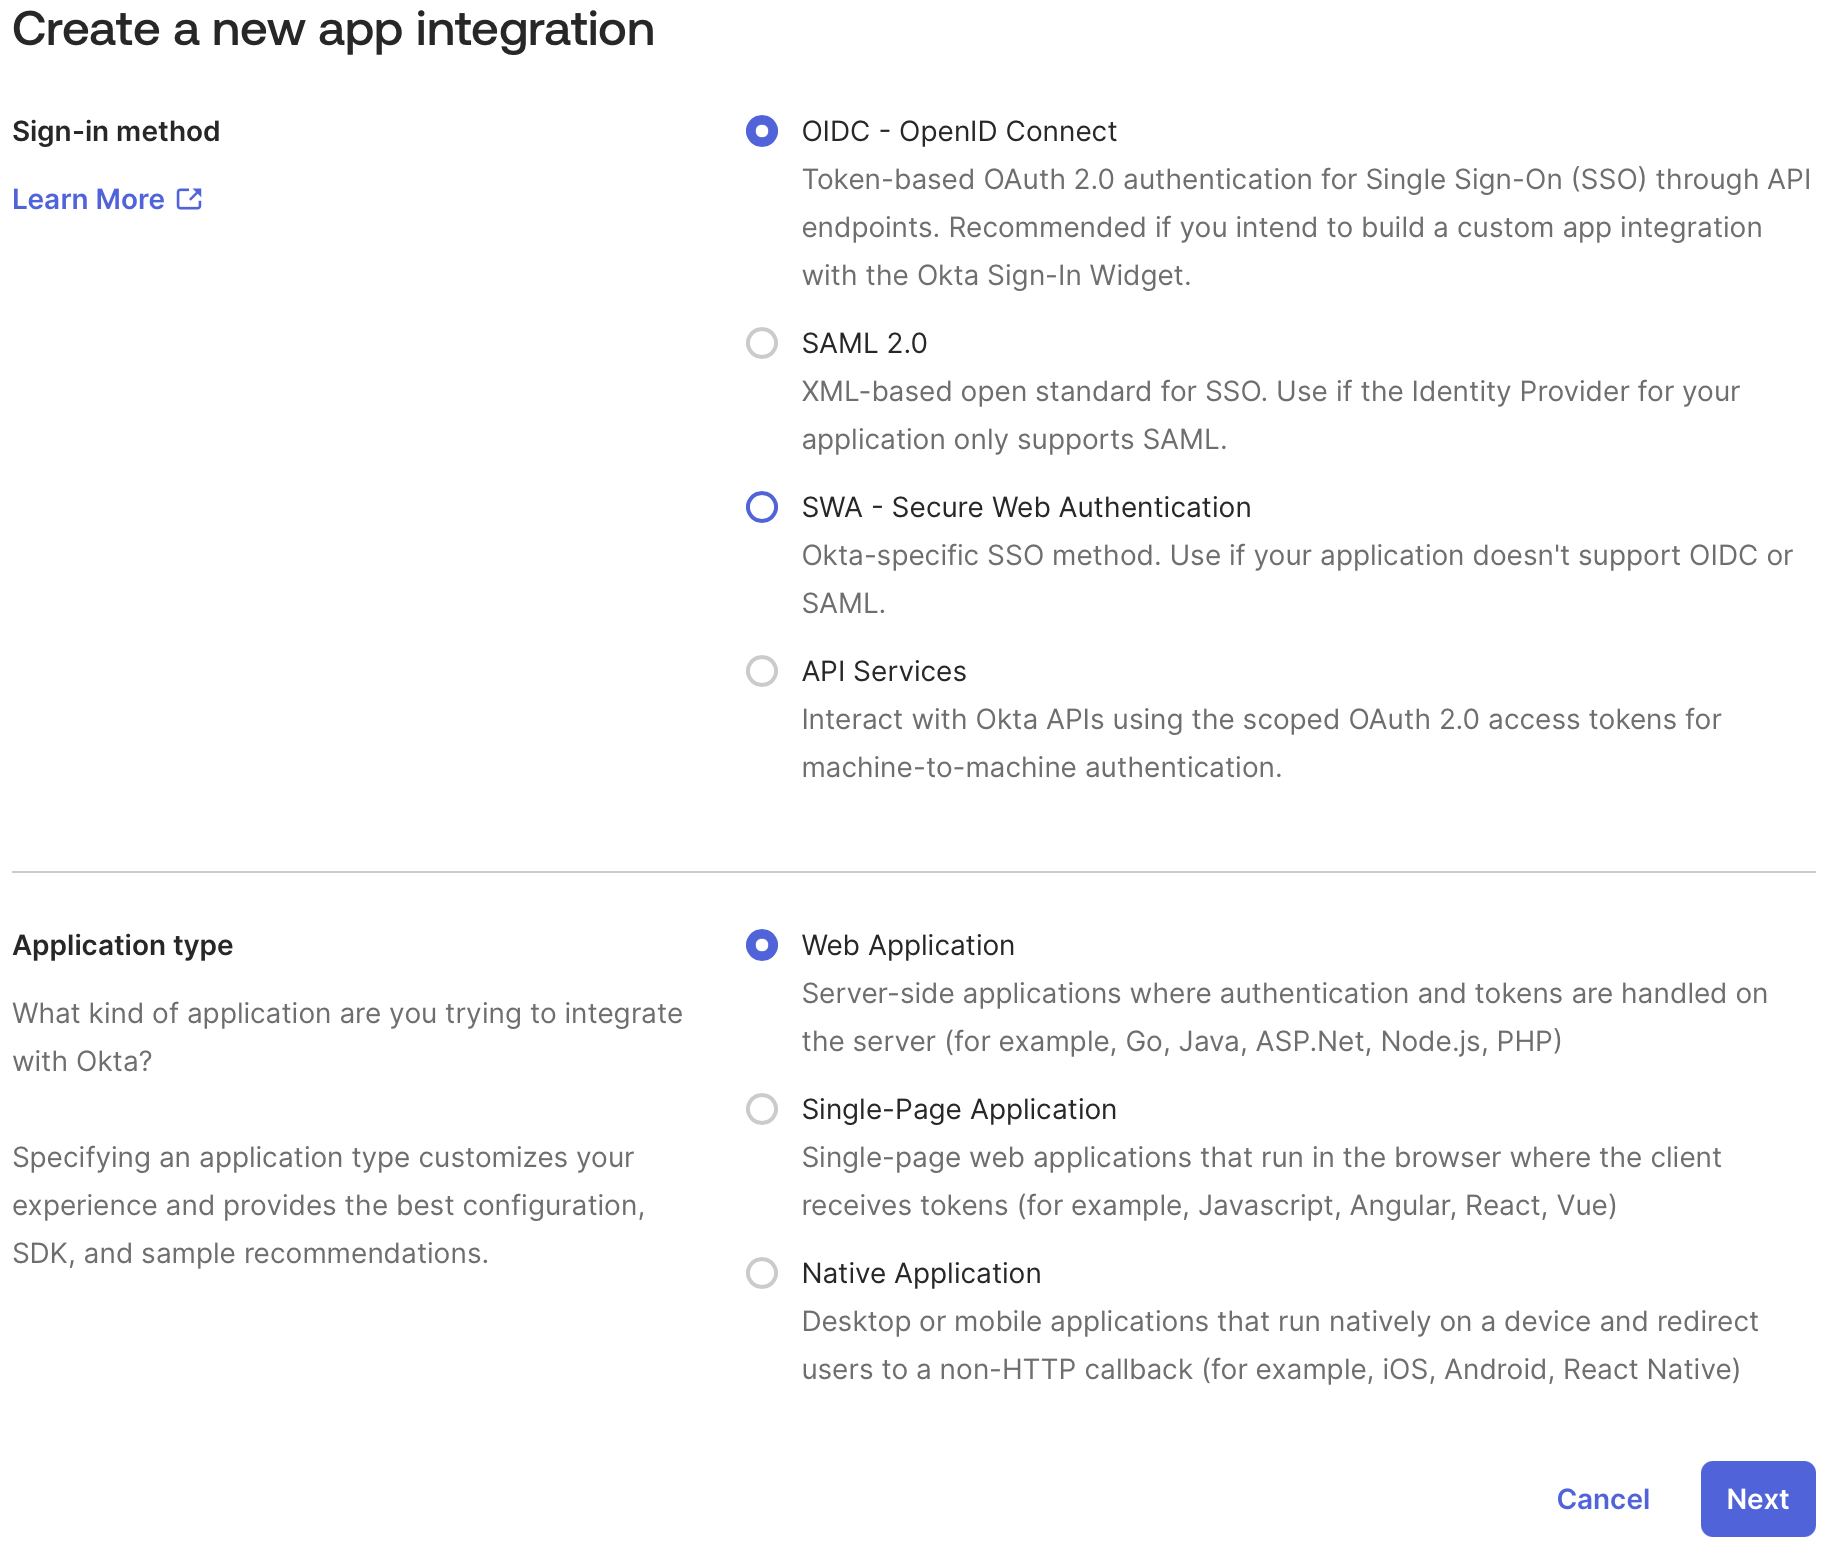
1. In the Okta Admin Console, navigate to **Applications > Applications > Create App Integration** and select **Web Application** as the **Application type**.
## Register the Requesting App in Okta
### Create Requesting App in Okta
Your Requesting App is a standard OIDC application. To create a Requesting App in Okta:
1. In the Okta Admin Console, navigate to **Applications > Applications > Create App Integration** and select **Web Application** as the **Application type**.
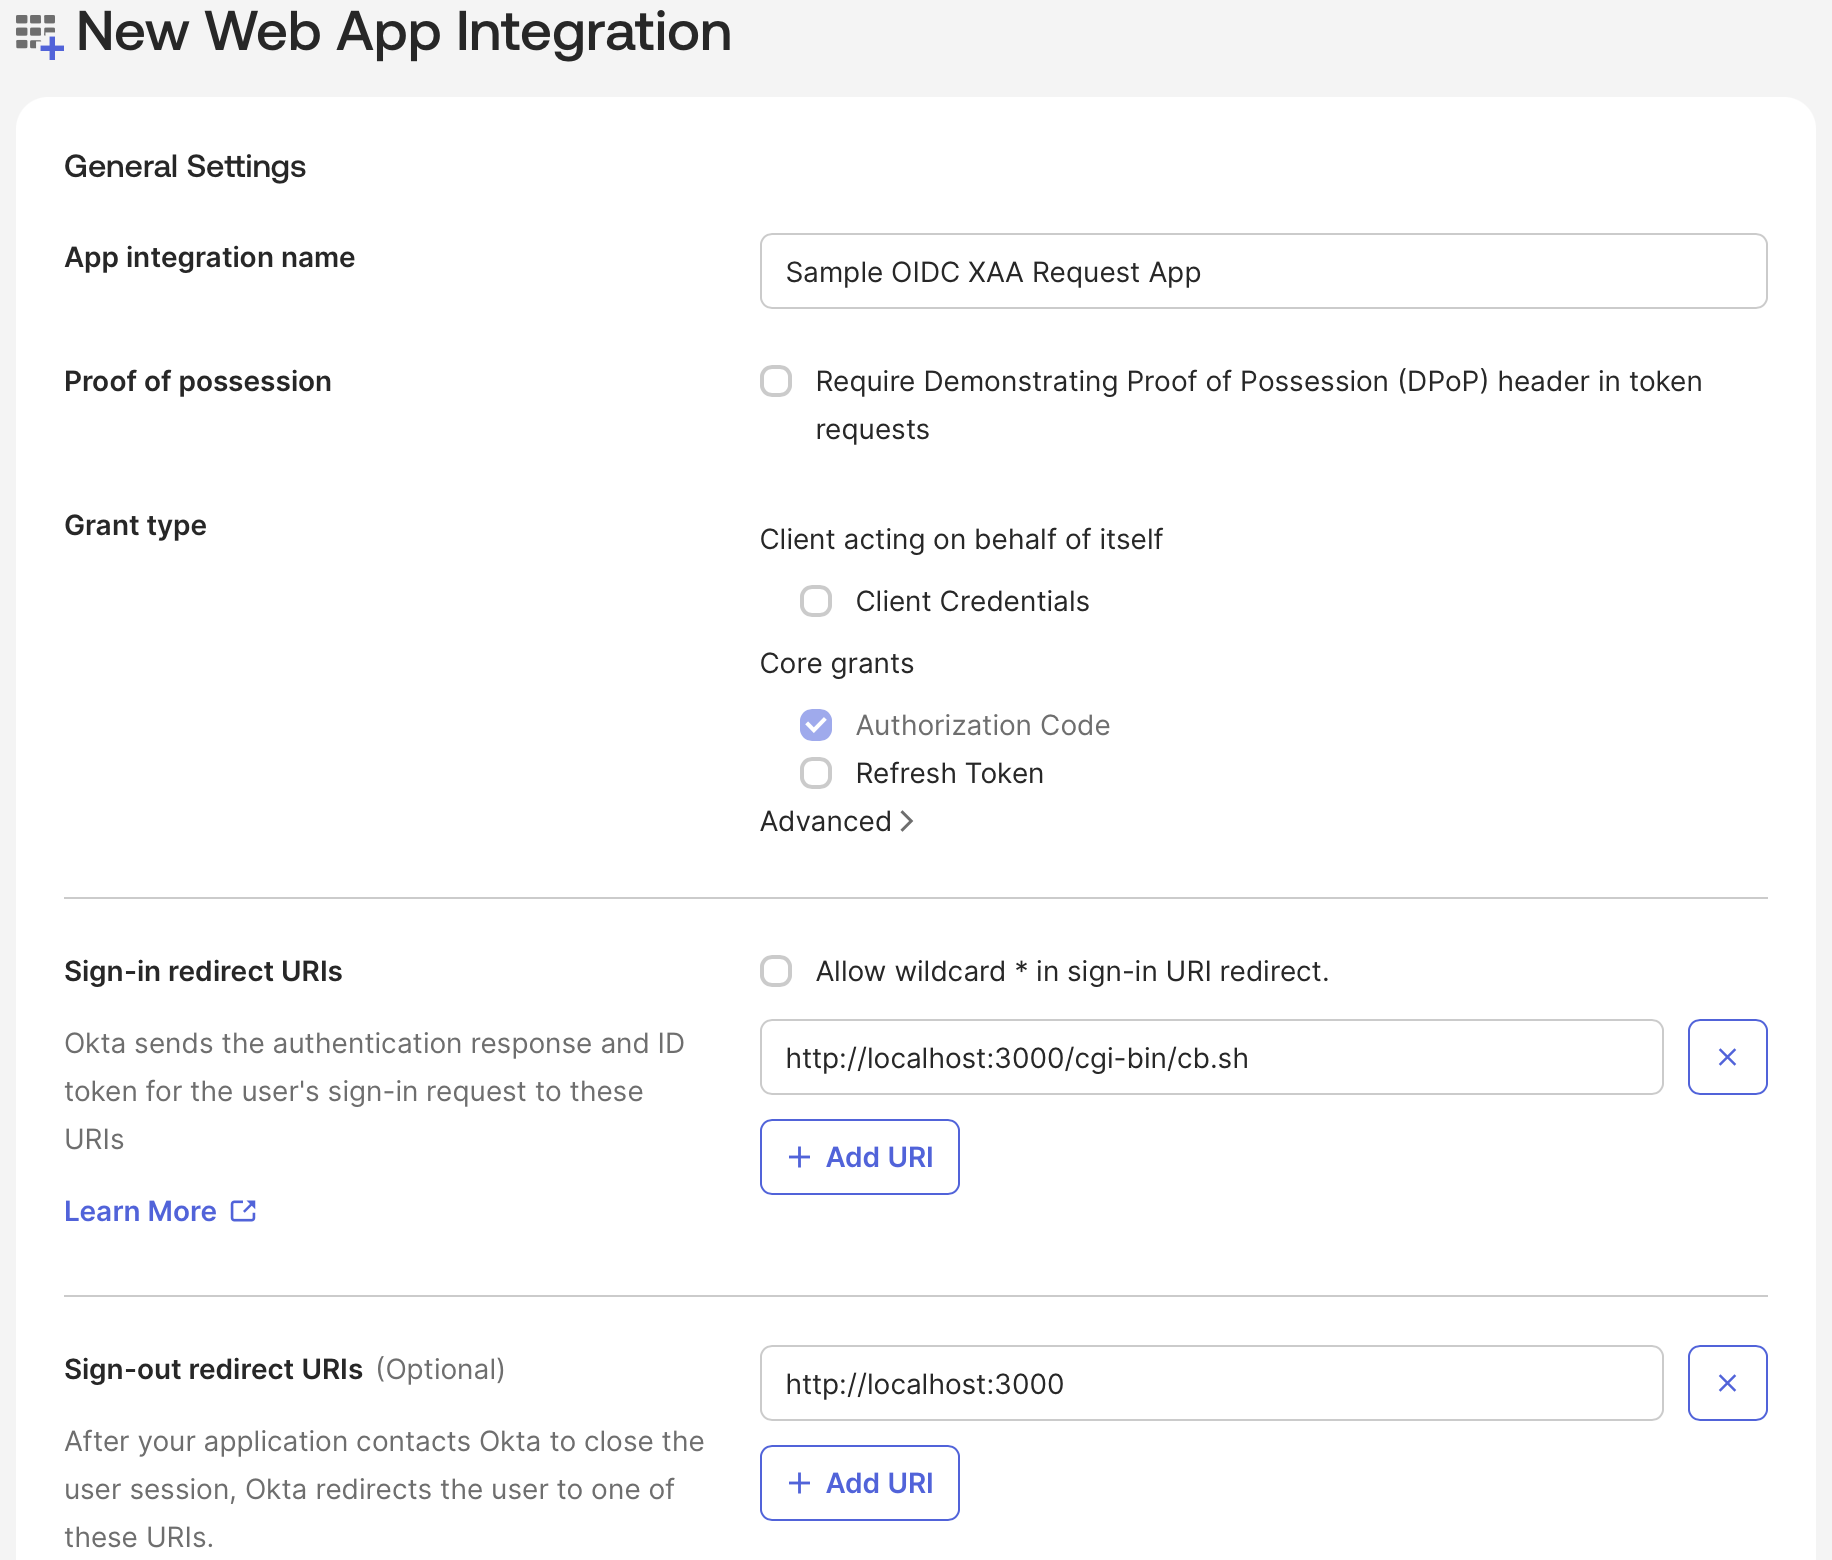
 Enter the application name, sign-in redirect URIs, and sign-out redirect URIs that redirect back to your web application. Skip the group assignment and select **Save**.
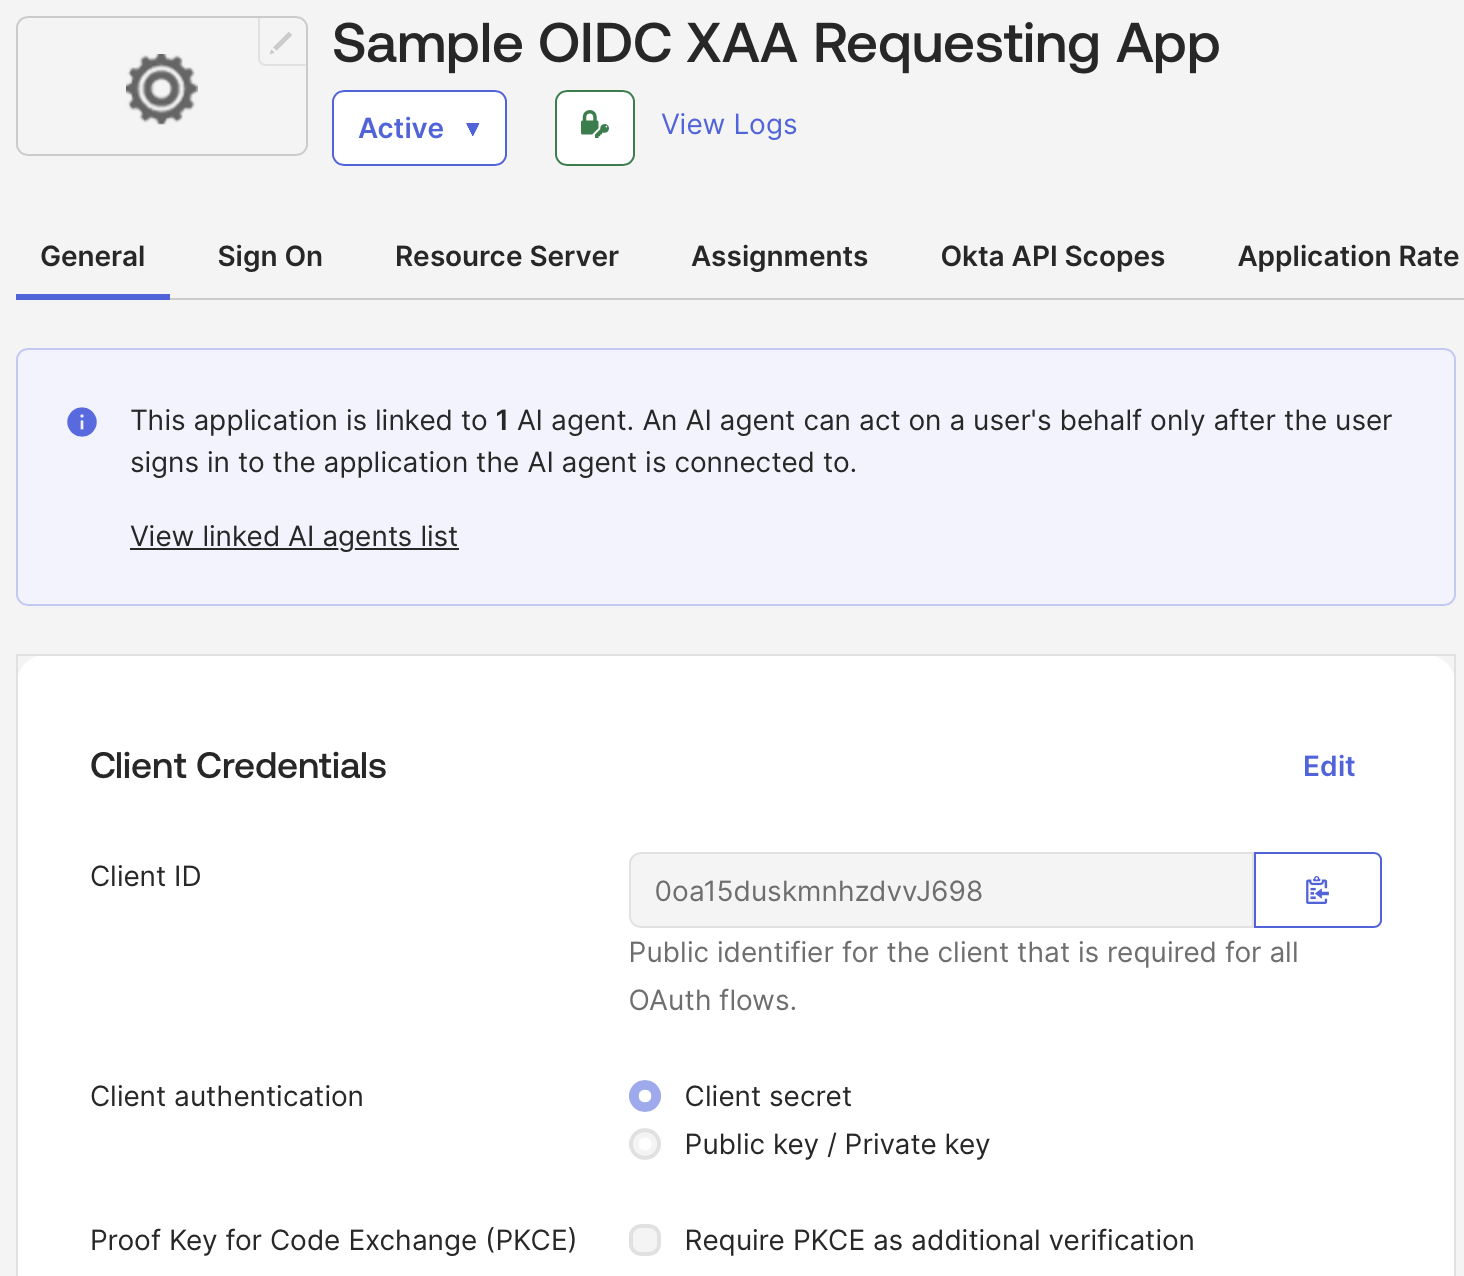
 Once you've created the Requesting App, Okta assigns it an OIDC Client ID and Secret.
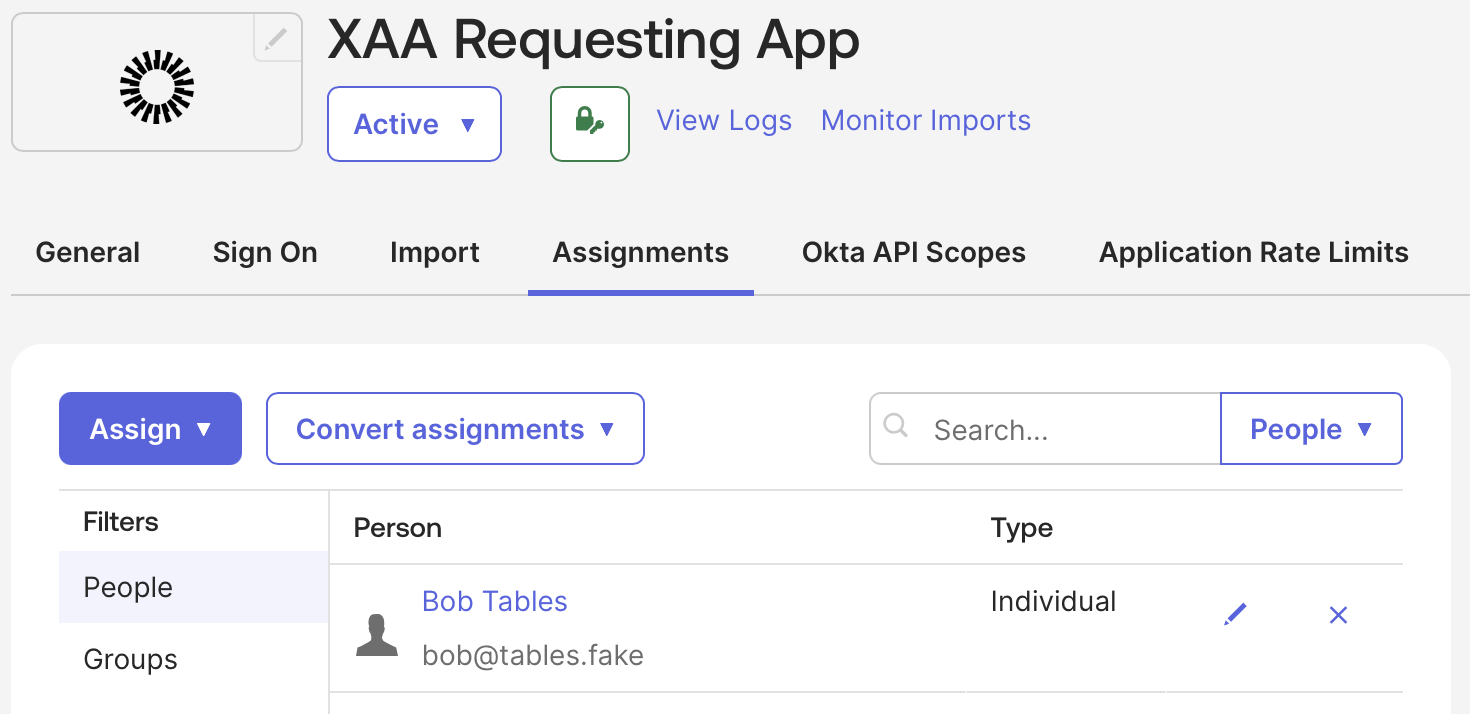
 ### Assign Requesting App to Test Users
Allow your test user to log in to the Requesting App in Okta.
In the Okta Admin Console:
1. Navigate to **Applications** and select the Requesting App you created.
2. Select **Assign > Assign to People** and select your test user.
3. Select **Save**.
### Assign Requesting App to Test Users
Allow your test user to log in to the Requesting App in Okta.
In the Okta Admin Console:
1. Navigate to **Applications** and select the Requesting App you created.
2. Select **Assign > Assign to People** and select your test user.
3. Select **Save**.
 ## Register the Resource App in Okta
### Create Resource App in Okta
Similar to the Requesting App, your Resource App is an OIDC web application.
1. In the Okta Admin Console, go to **Applications > Applications > Create App Integration** and select **Web Application** as the **Application type**.
2. Under **Sign On**, select **Edit** and add your **Auth0 Tenant’s callback URL** in the **Redirect URI** field. Your callback URL is your Auth0 domain followed by `/login/callback`.
3. Select **Save**.
## Register the Resource App in Okta
### Create Resource App in Okta
Similar to the Requesting App, your Resource App is an OIDC web application.
1. In the Okta Admin Console, go to **Applications > Applications > Create App Integration** and select **Web Application** as the **Application type**.
2. Under **Sign On**, select **Edit** and add your **Auth0 Tenant’s callback URL** in the **Redirect URI** field. Your callback URL is your Auth0 domain followed by `/login/callback`.
3. Select **Save**.
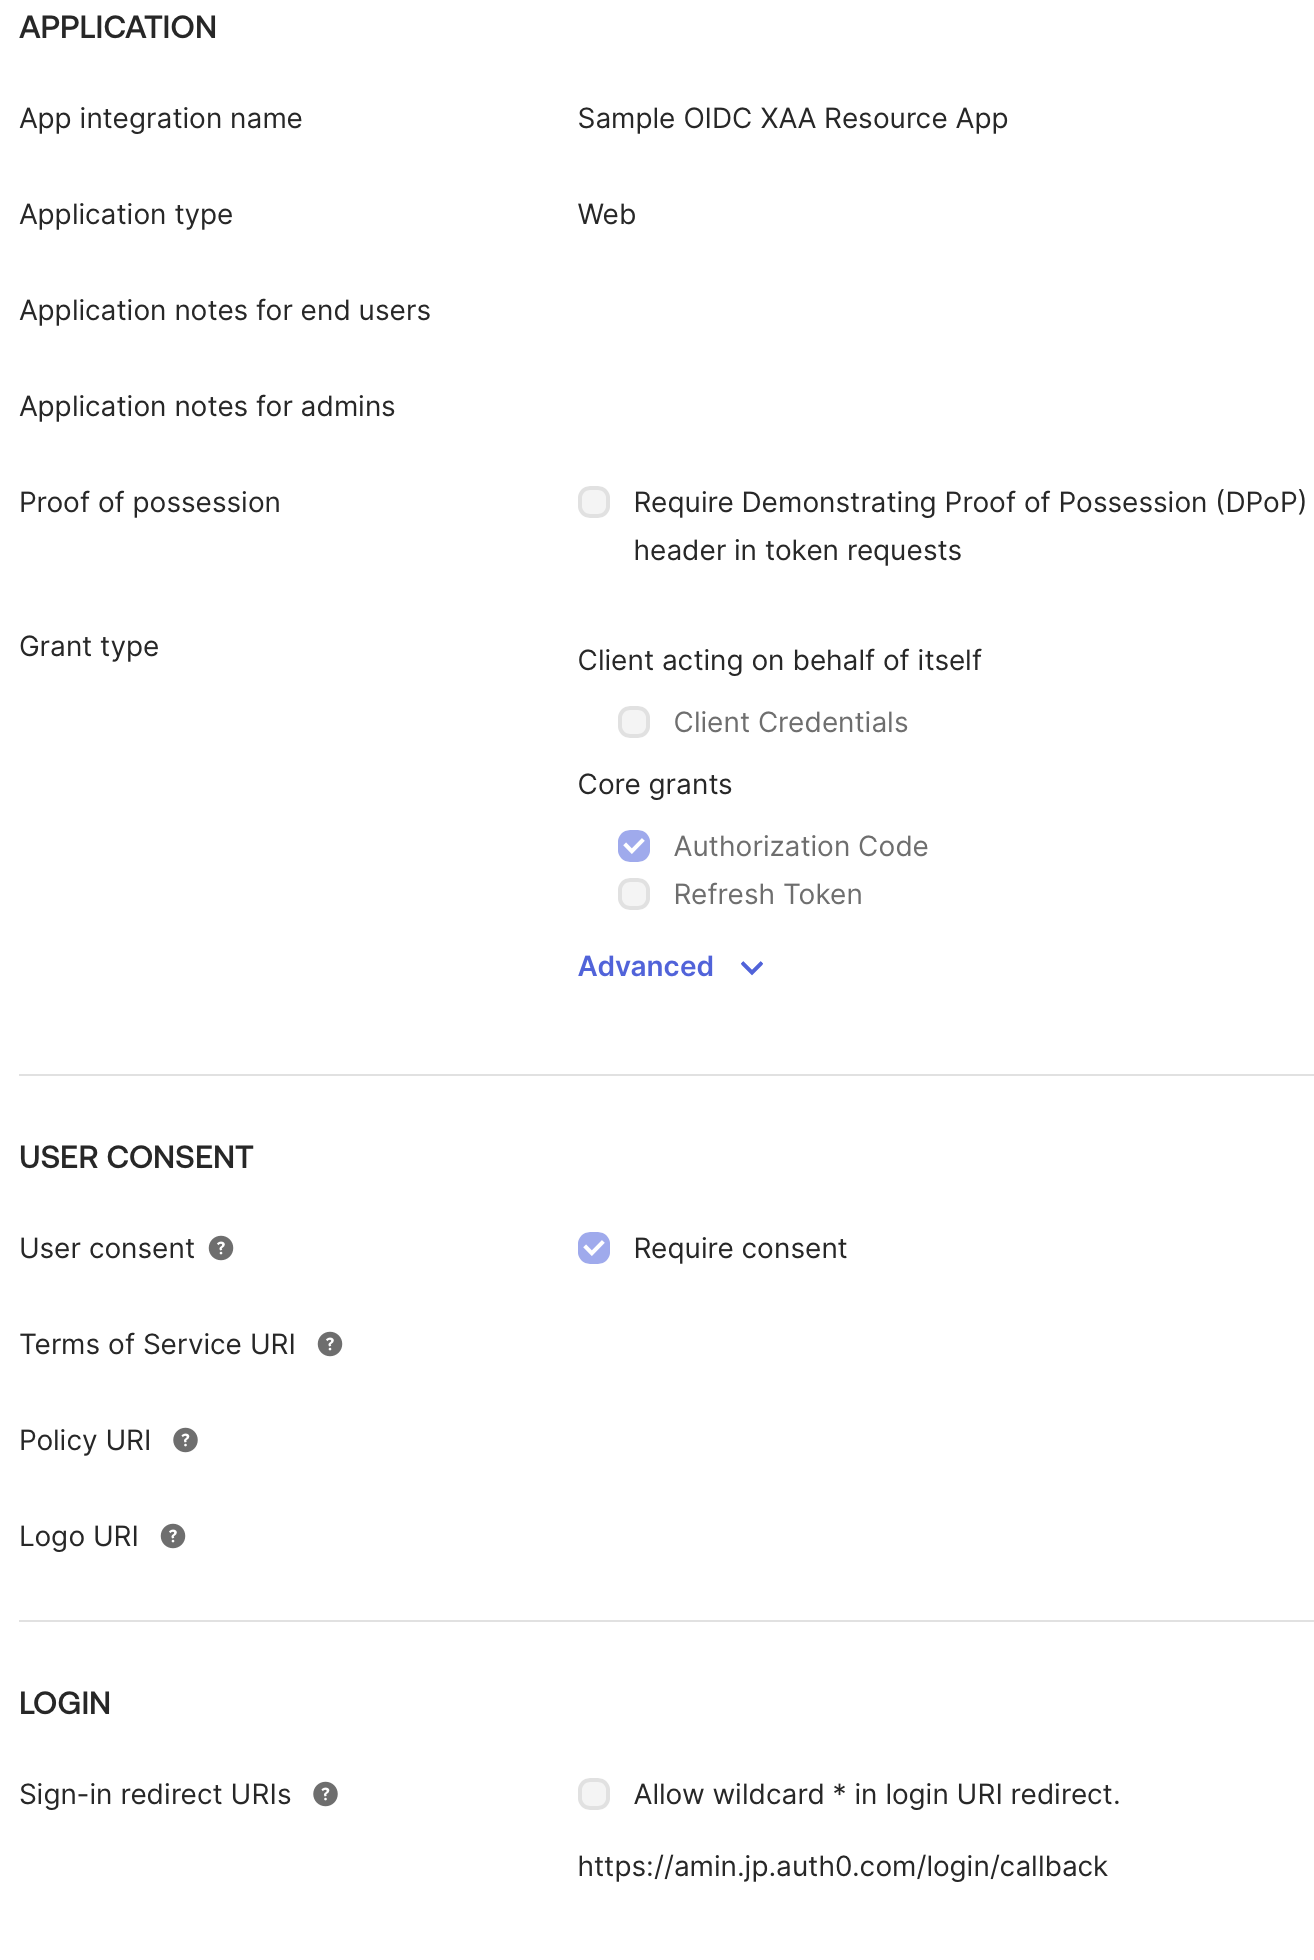
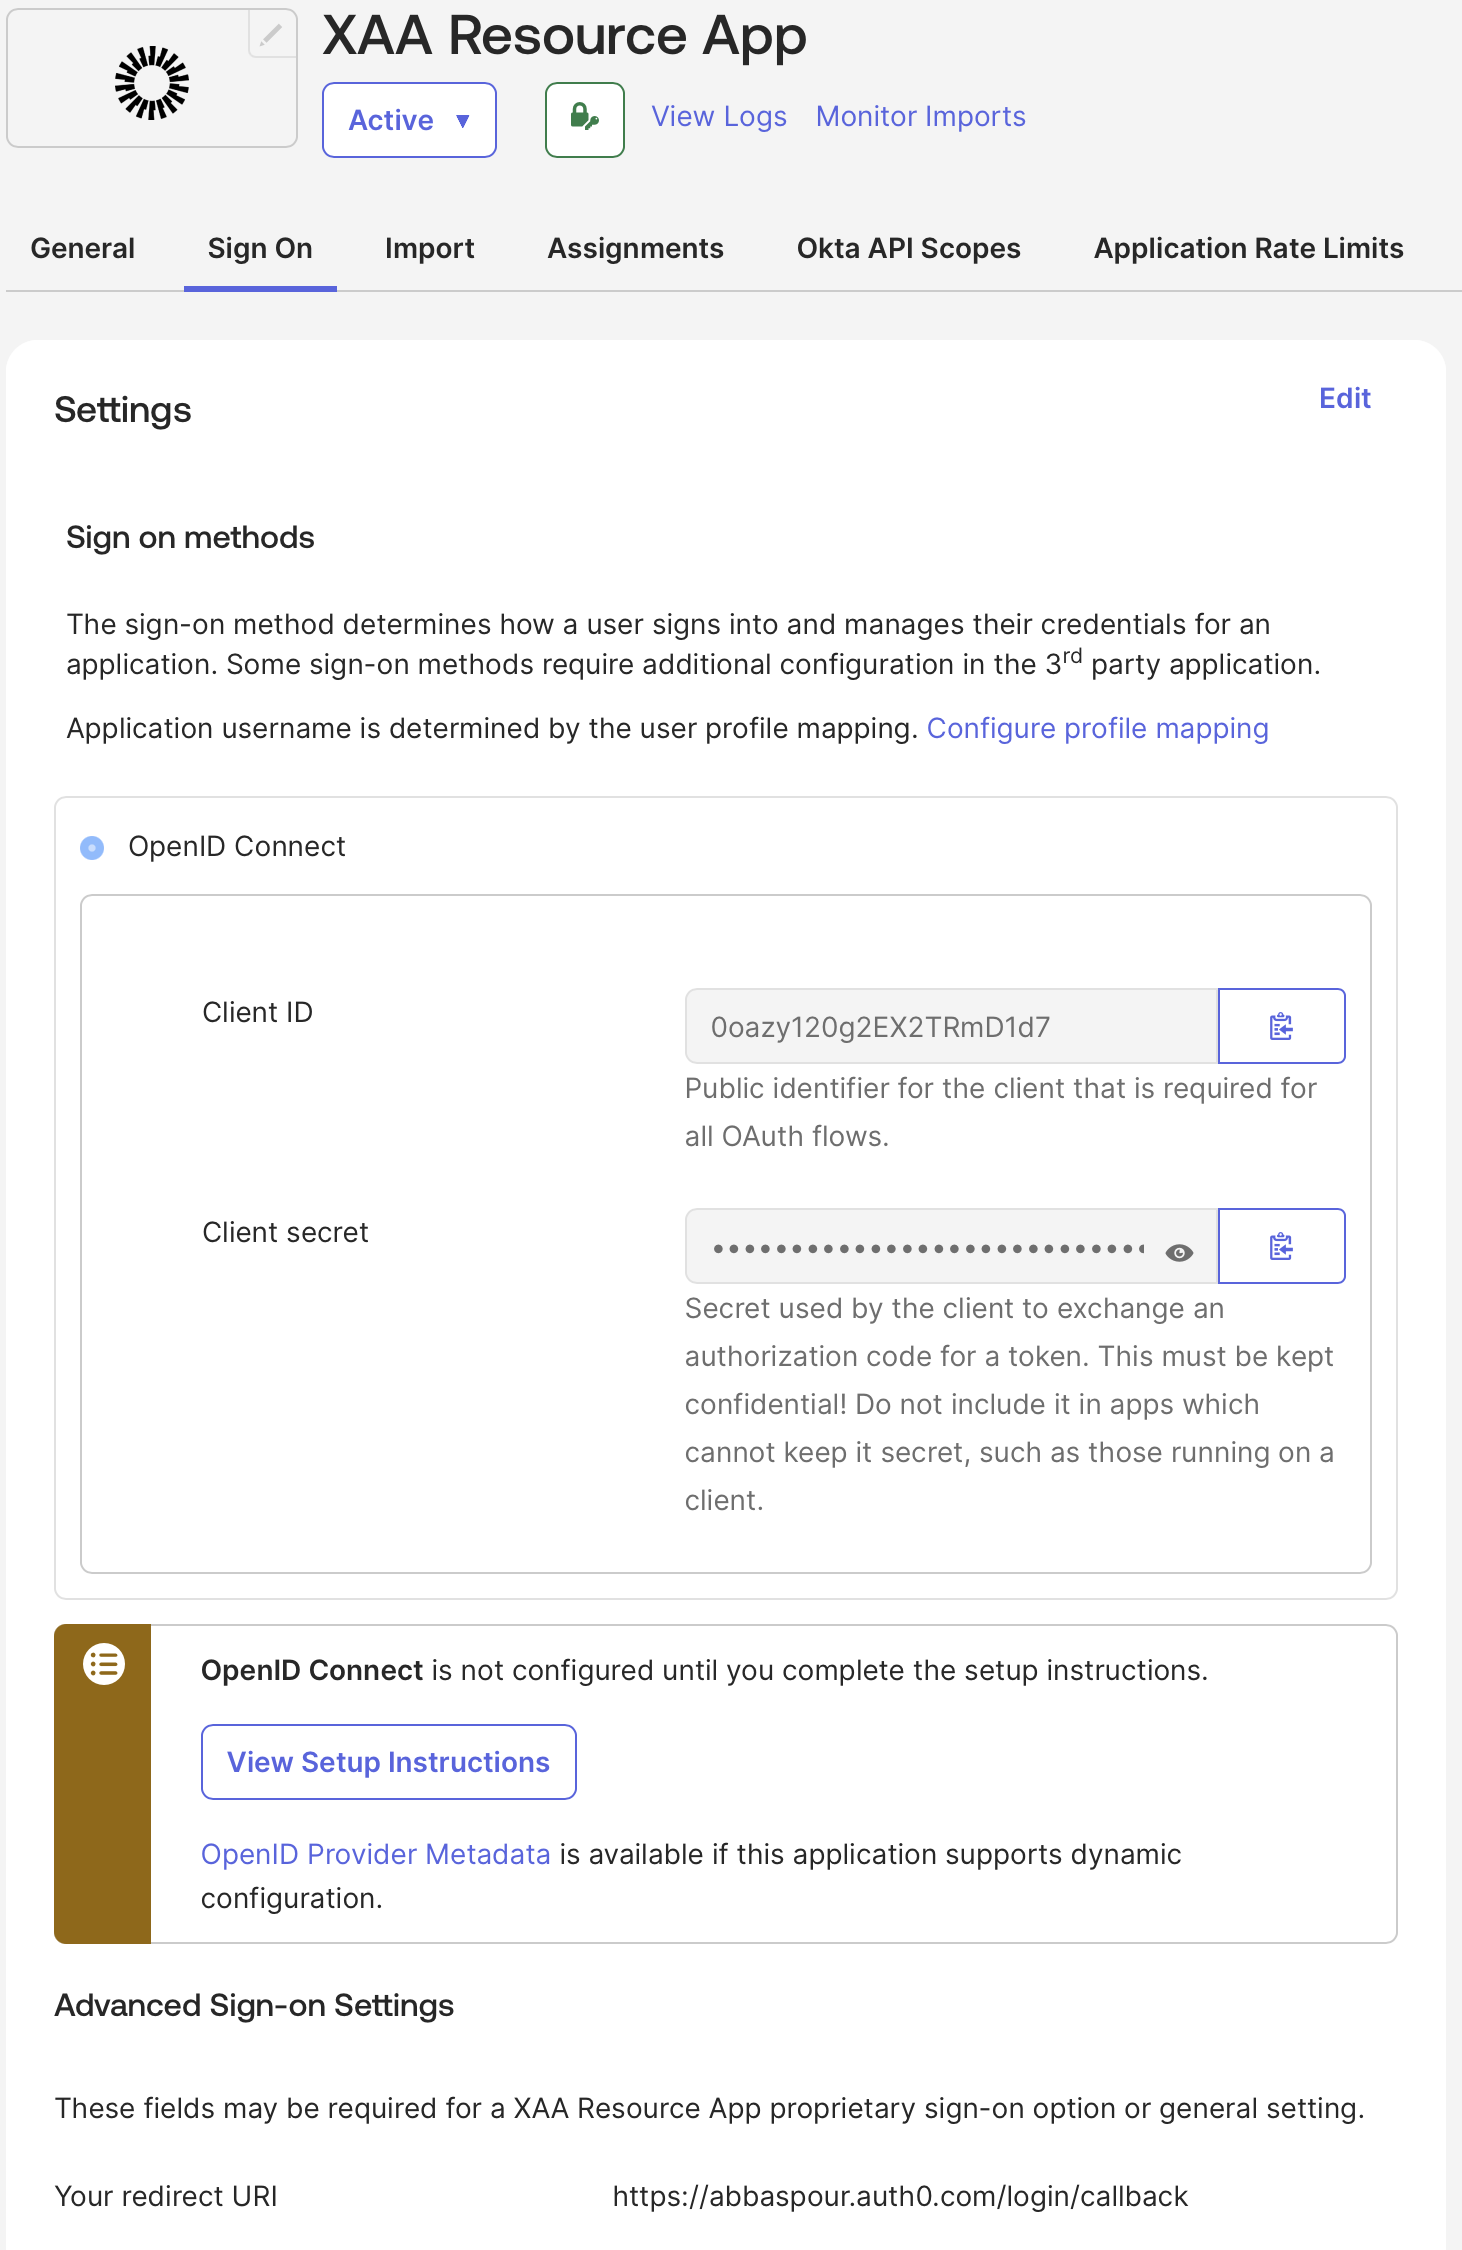 To check that the Resource App's sign-in redirect URIs point back to your Auth0 tenant's `/login/callback` URL, go to **General > LOGIN**.
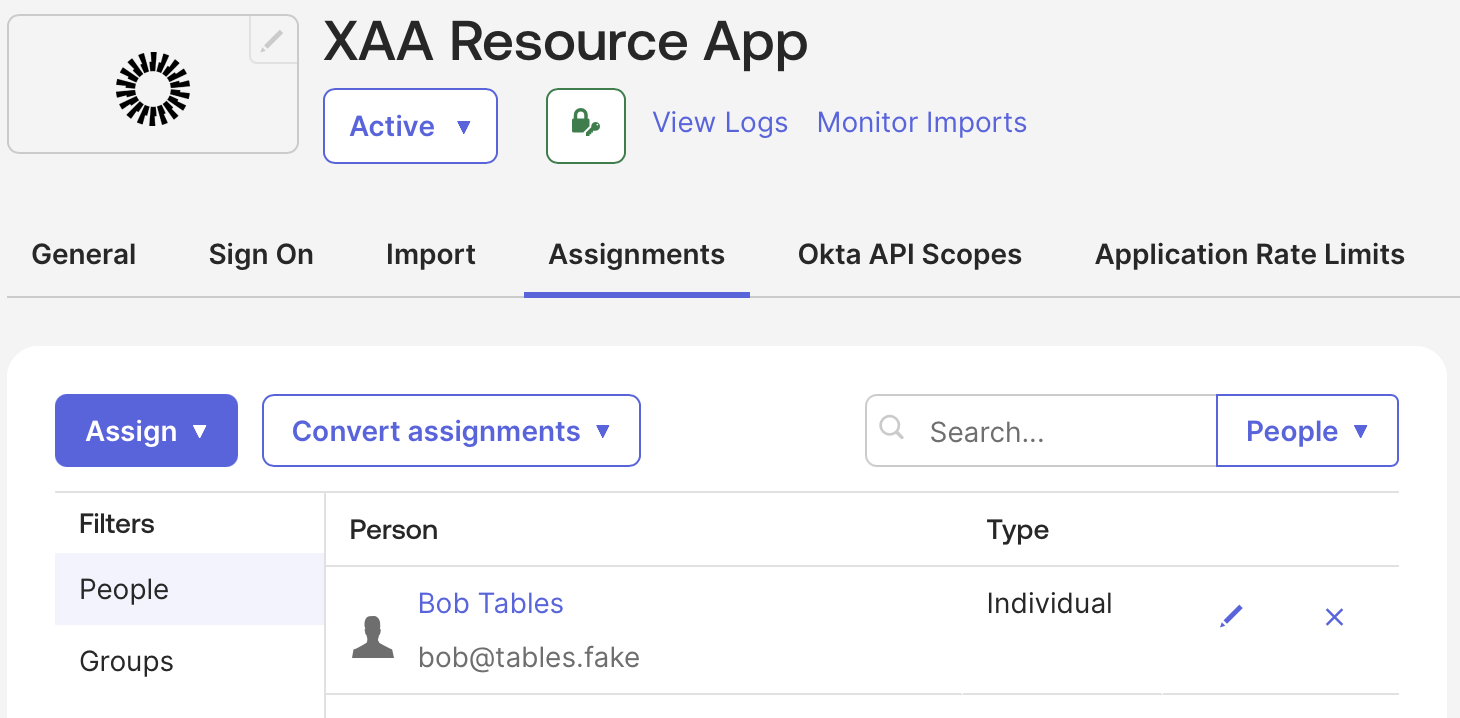
 ### Assign Resource App to Test Users
Allow your test user to log in to the Resource App in Okta.
In the Okta Admin Console:
1. Navigate to **Applications** and select the Resource App you created.
2. Select **Assign > Assign to People** and select your test user.
3. Select **Save**.
### Assign Resource App to Test Users
Allow your test user to log in to the Resource App in Okta.
In the Okta Admin Console:
1. Navigate to **Applications** and select the Resource App you created.
2. Select **Assign > Assign to People** and select your test user.
3. Select **Save**.
 ### Enable Cross-app Access (XAA) in Resource App
Go to the **Resource Server** tab and enable Cross-app access (XAA) for the Resource App. Enter the **Issuer URL** of the Resource App's authorization server: `https://YOUR_AUTH0_DOMAIN/`.
### Enable Cross-app Access (XAA) in Resource App
Go to the **Resource Server** tab and enable Cross-app access (XAA) for the Resource App. Enter the **Issuer URL** of the Resource App's authorization server: `https://YOUR_AUTH0_DOMAIN/`.
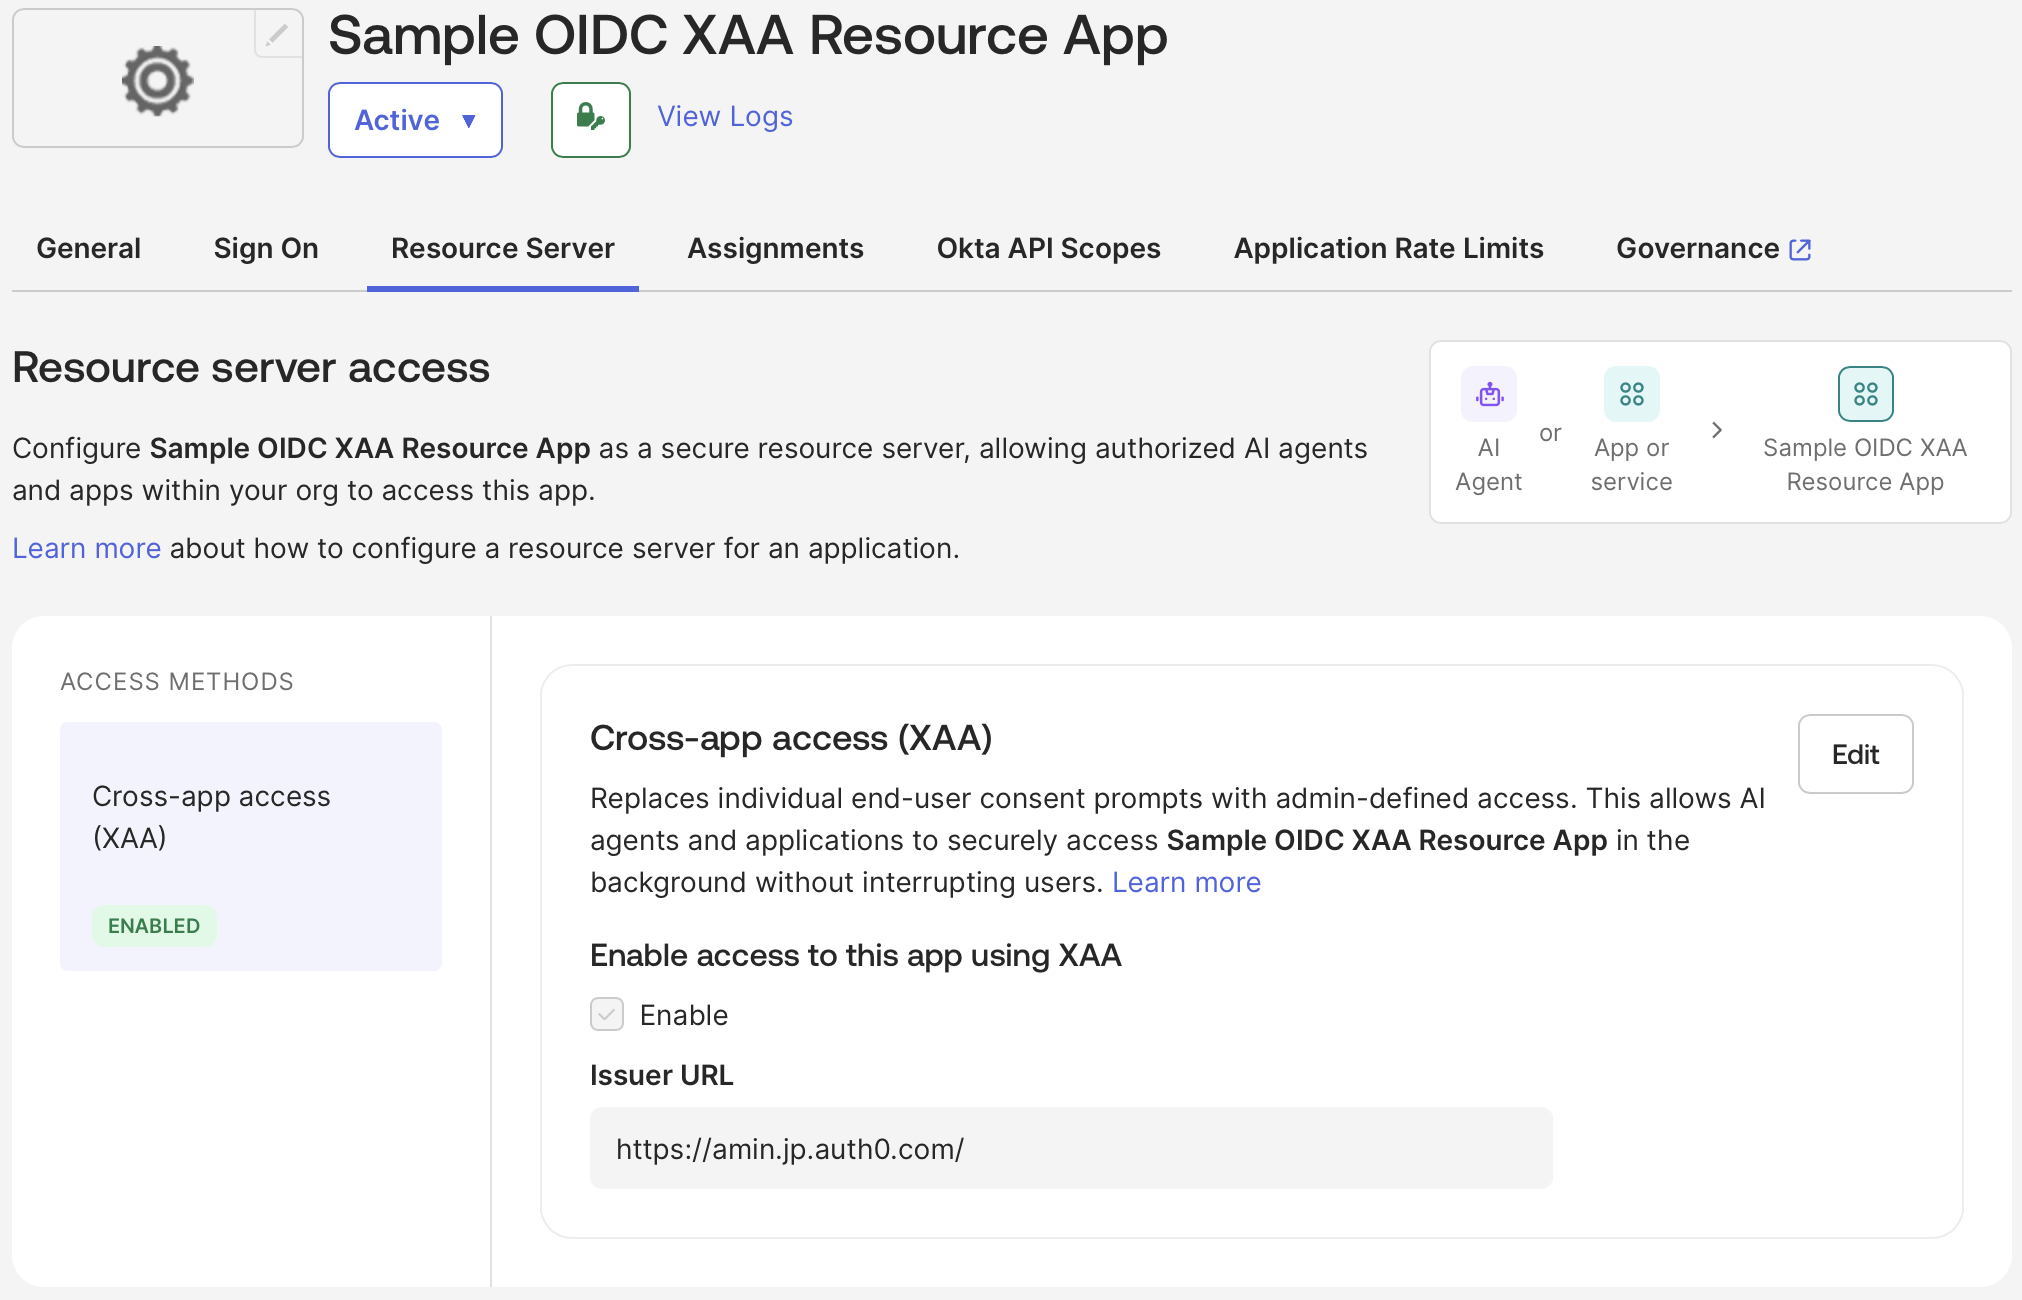 Auth0 issues and accepts tokens with an issuer URL that must end with the trailing forward slash **`/`**.
## Register AI Agent in Okta
### Create AI Agent
Go to **Directory > AI Agents > Register AI Agent** and select **Register manually**. Enter a name for your agent and assign an owner.
Auth0 issues and accepts tokens with an issuer URL that must end with the trailing forward slash **`/`**.
## Register AI Agent in Okta
### Create AI Agent
Go to **Directory > AI Agents > Register AI Agent** and select **Register manually**. Enter a name for your agent and assign an owner.
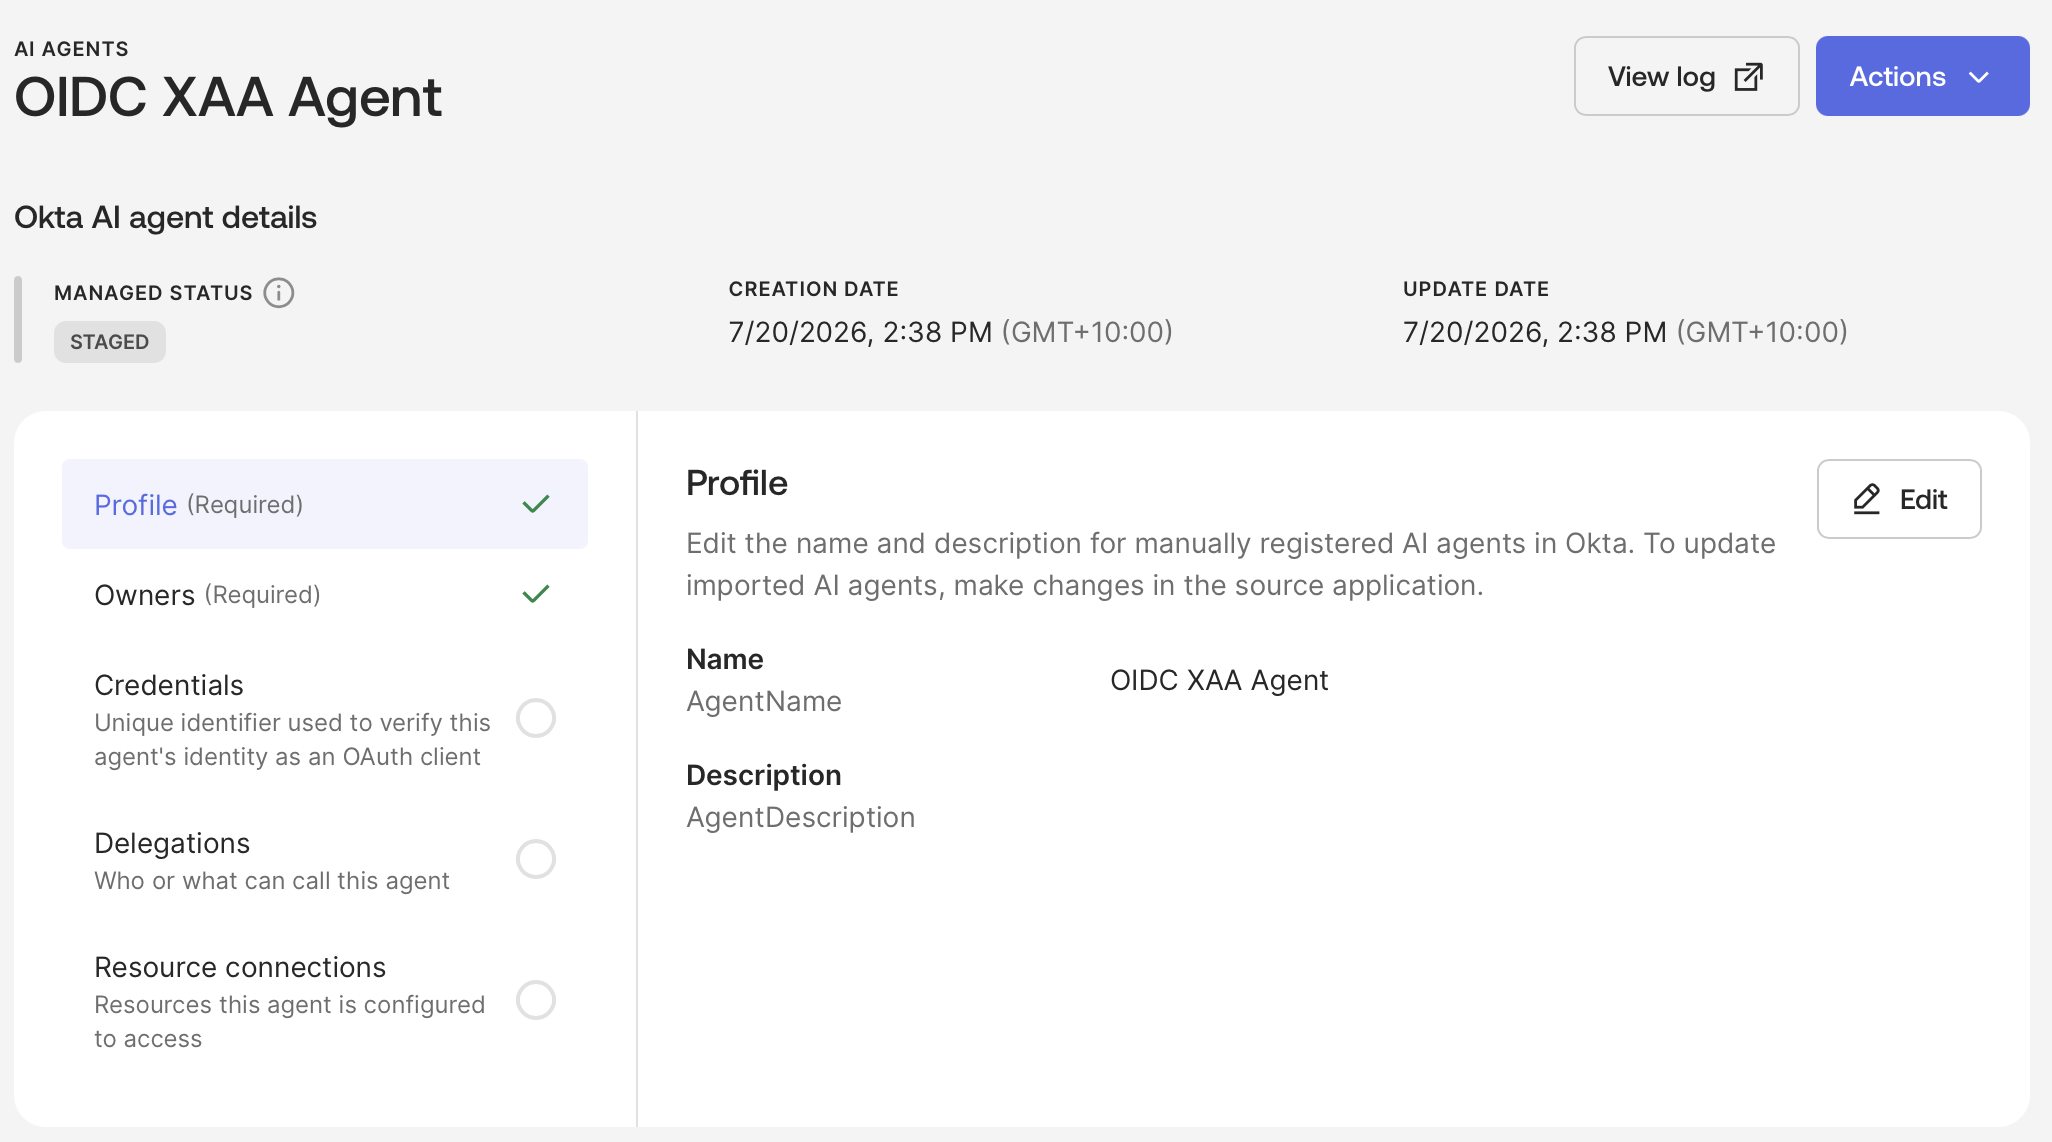
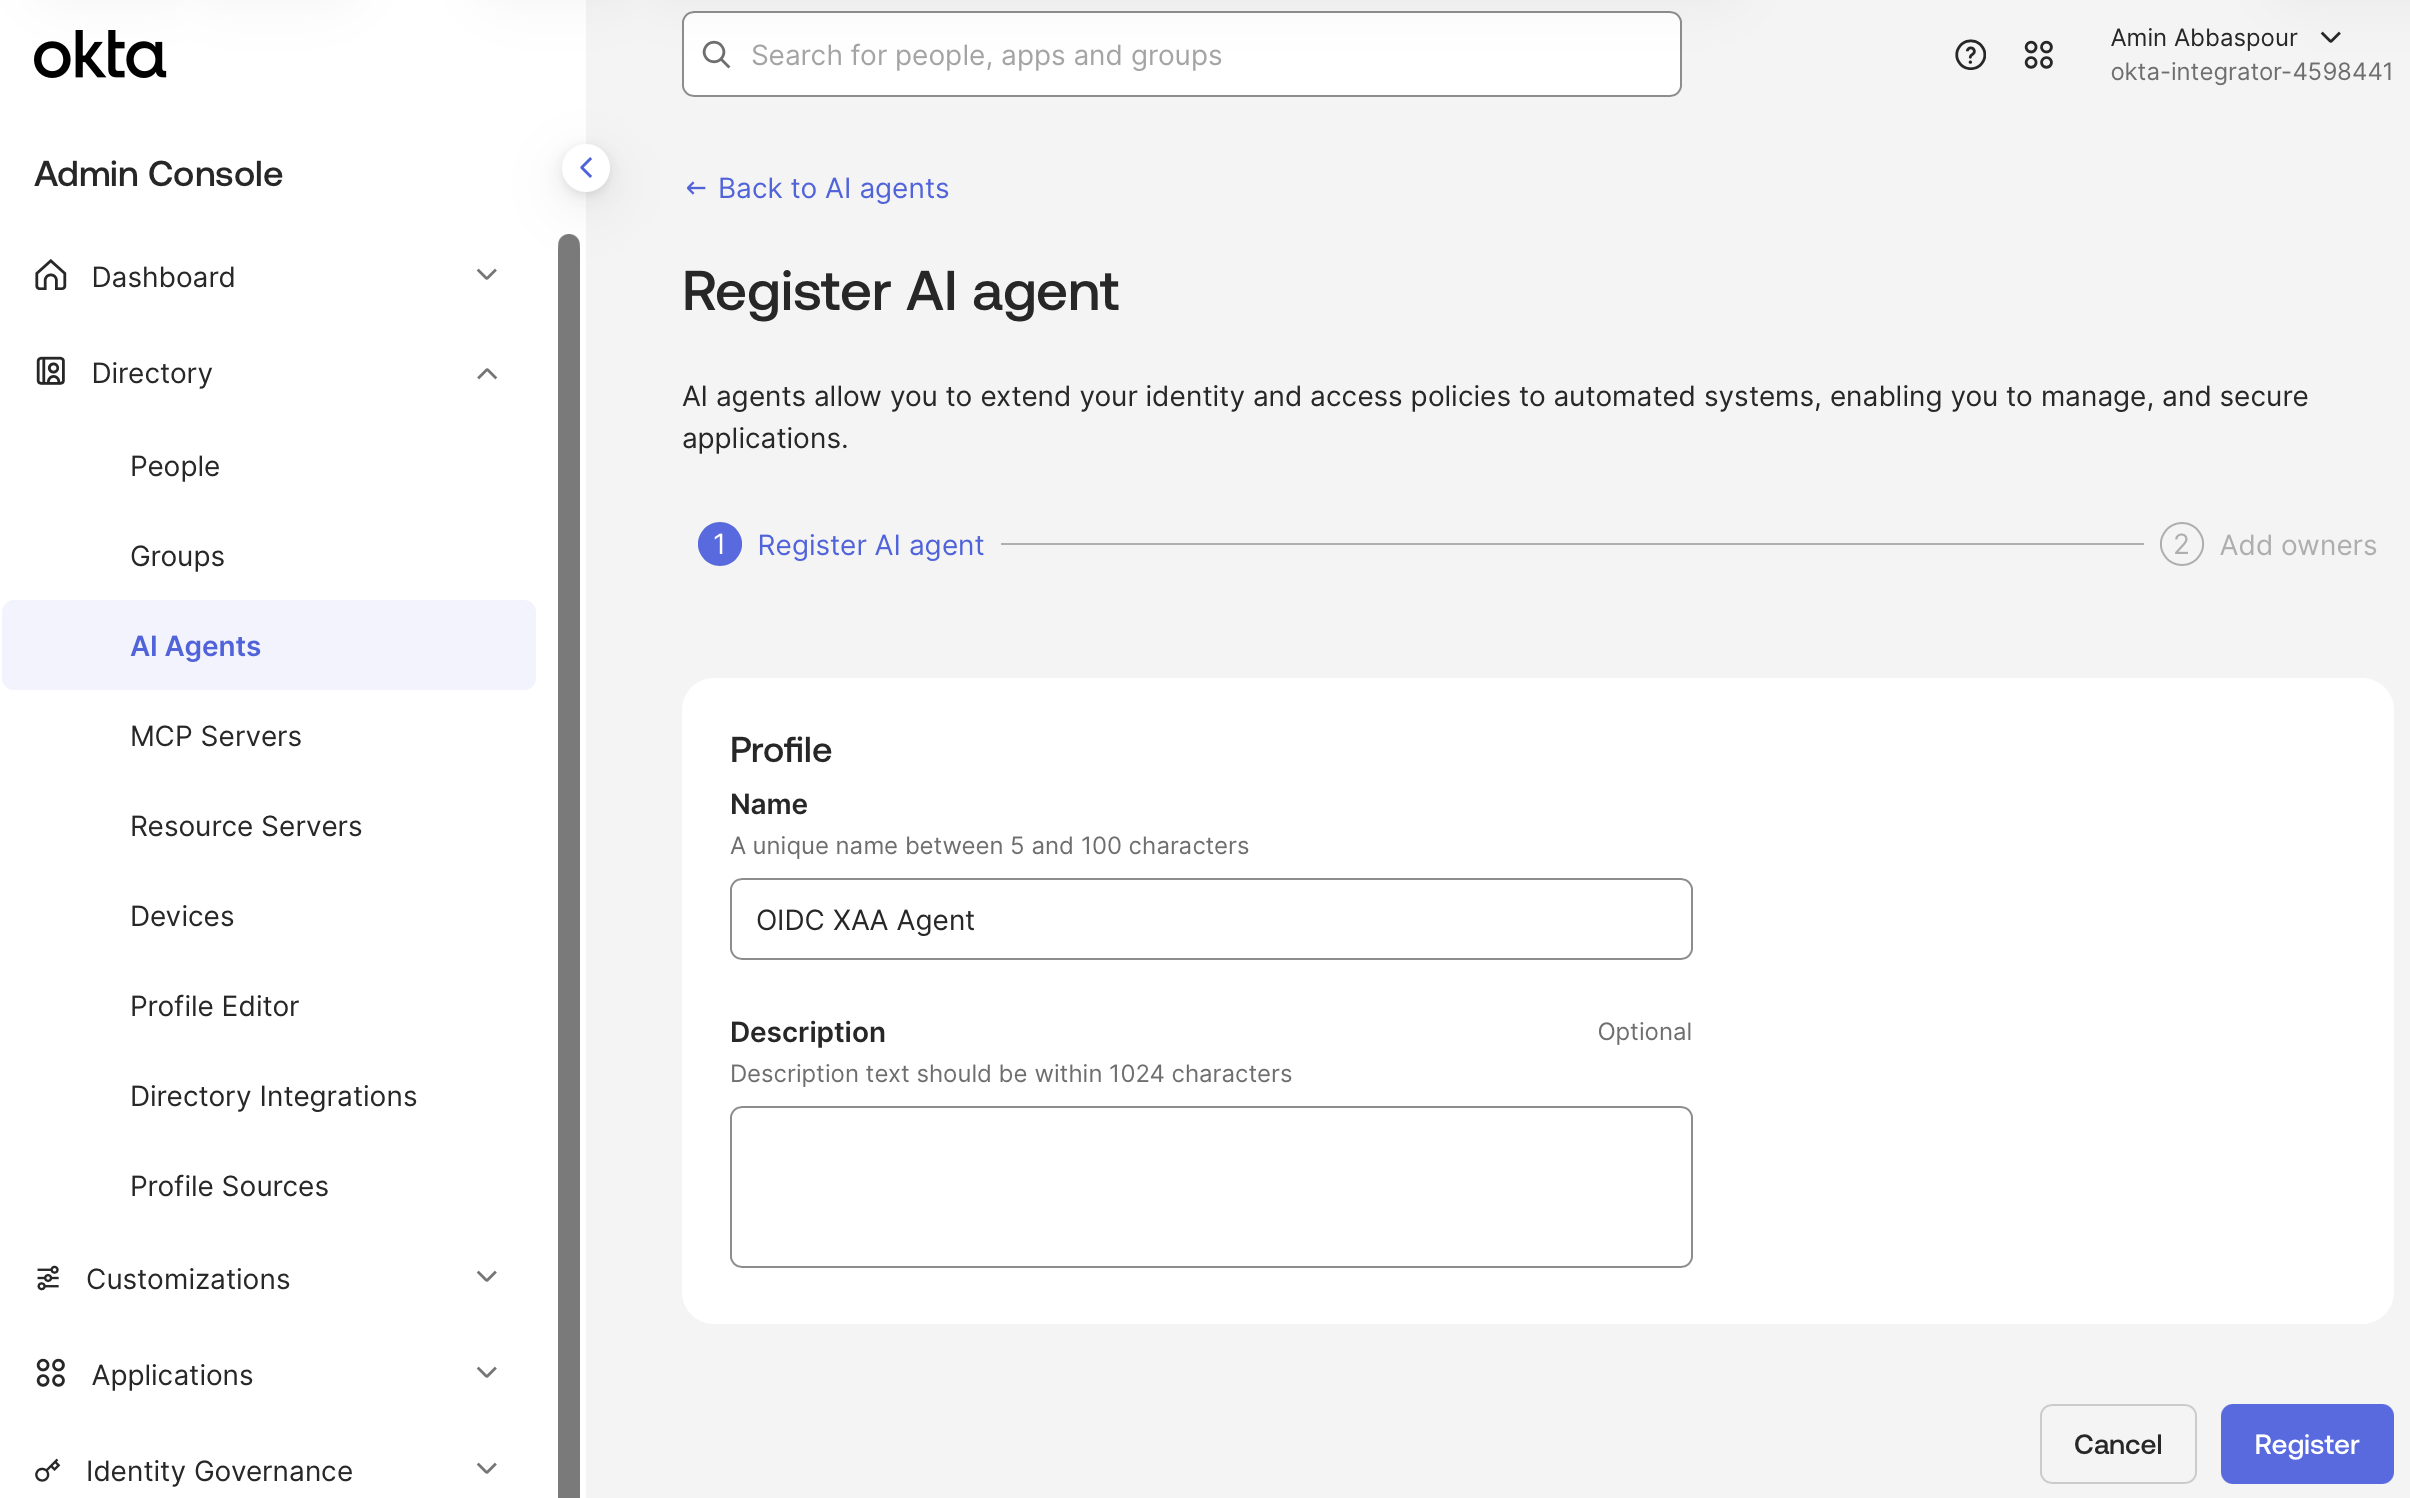 At this stage, your AI agent is `STAGED`. Before activating the agent, complete the following steps.
 ### Add Agent Credentials
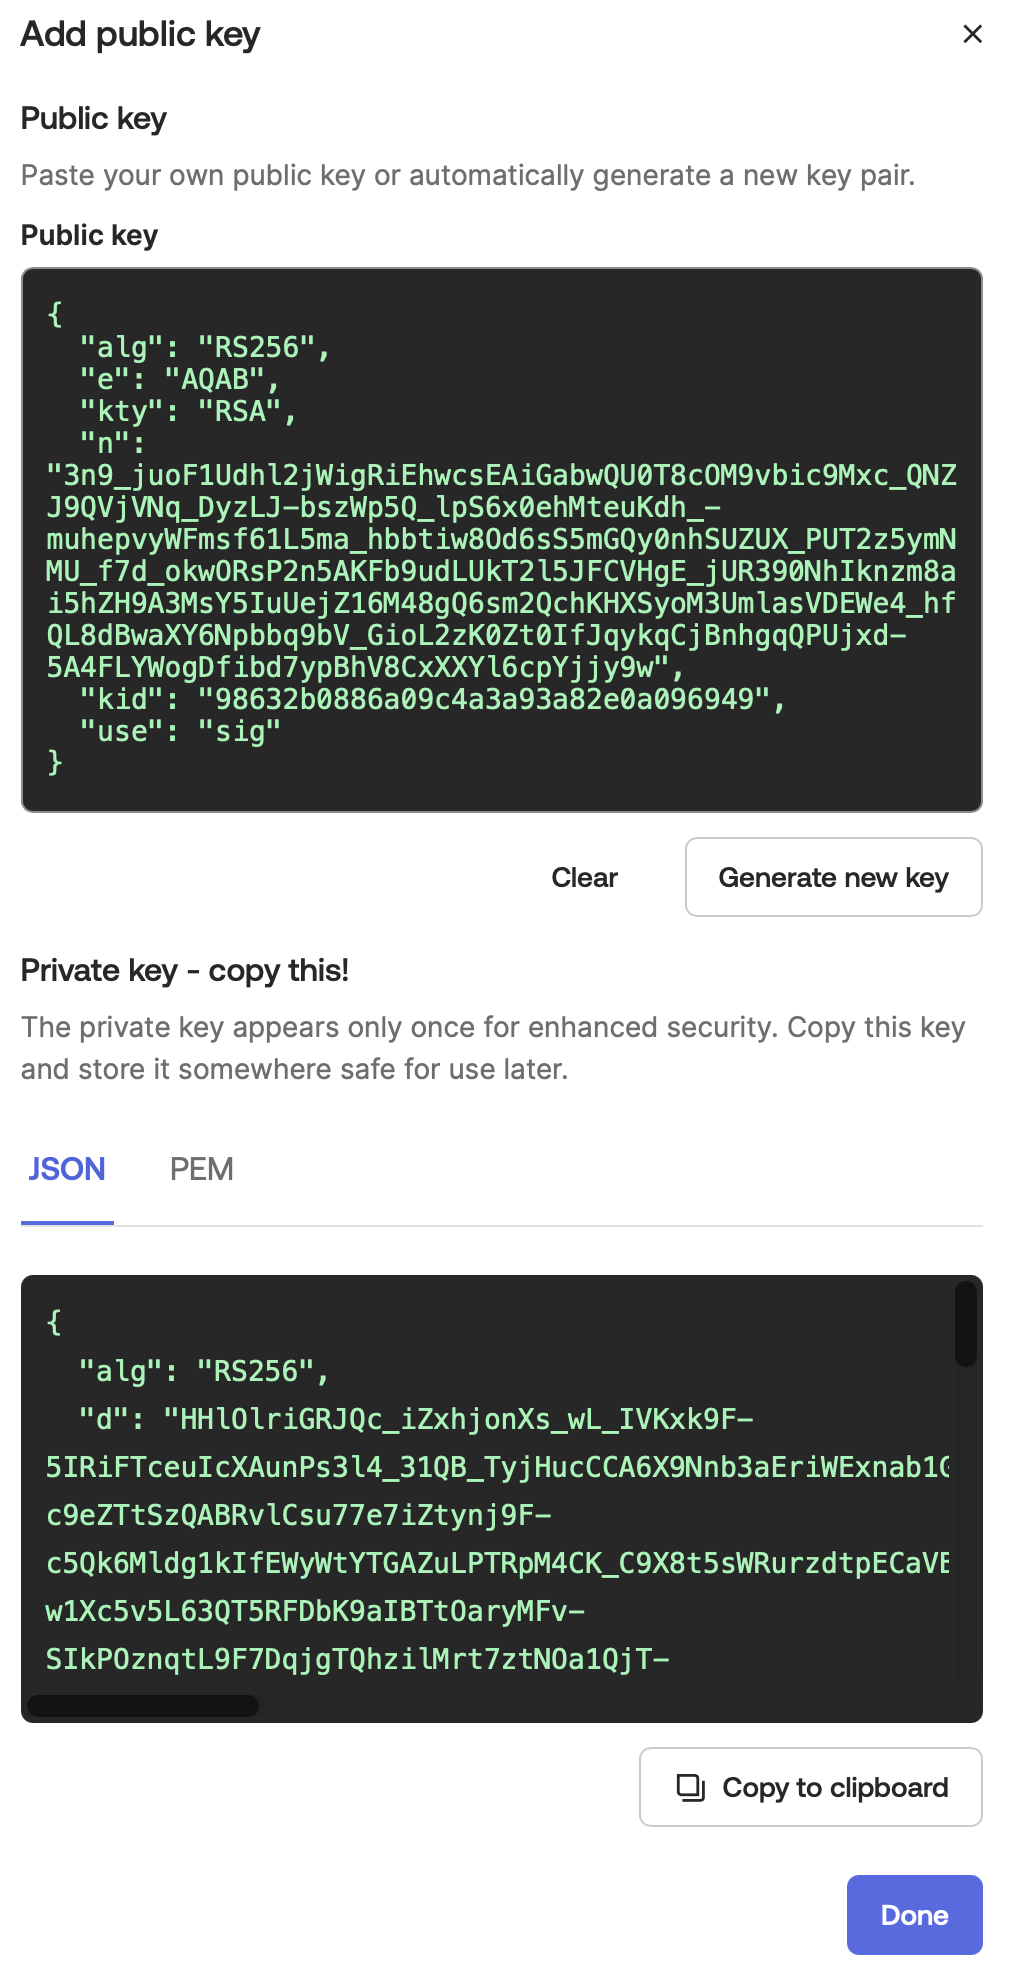
AI Agents authenticate on behalf of your applications with [private key JWT](/docs/get-started/authentication-and-authorization-flow/authenticate-with-private-key-jwt). In the **Credentials** tab, select **Add public key**.
### Add Agent Credentials
AI Agents authenticate on behalf of your applications with [private key JWT](/docs/get-started/authentication-and-authorization-flow/authenticate-with-private-key-jwt). In the **Credentials** tab, select **Add public key**.
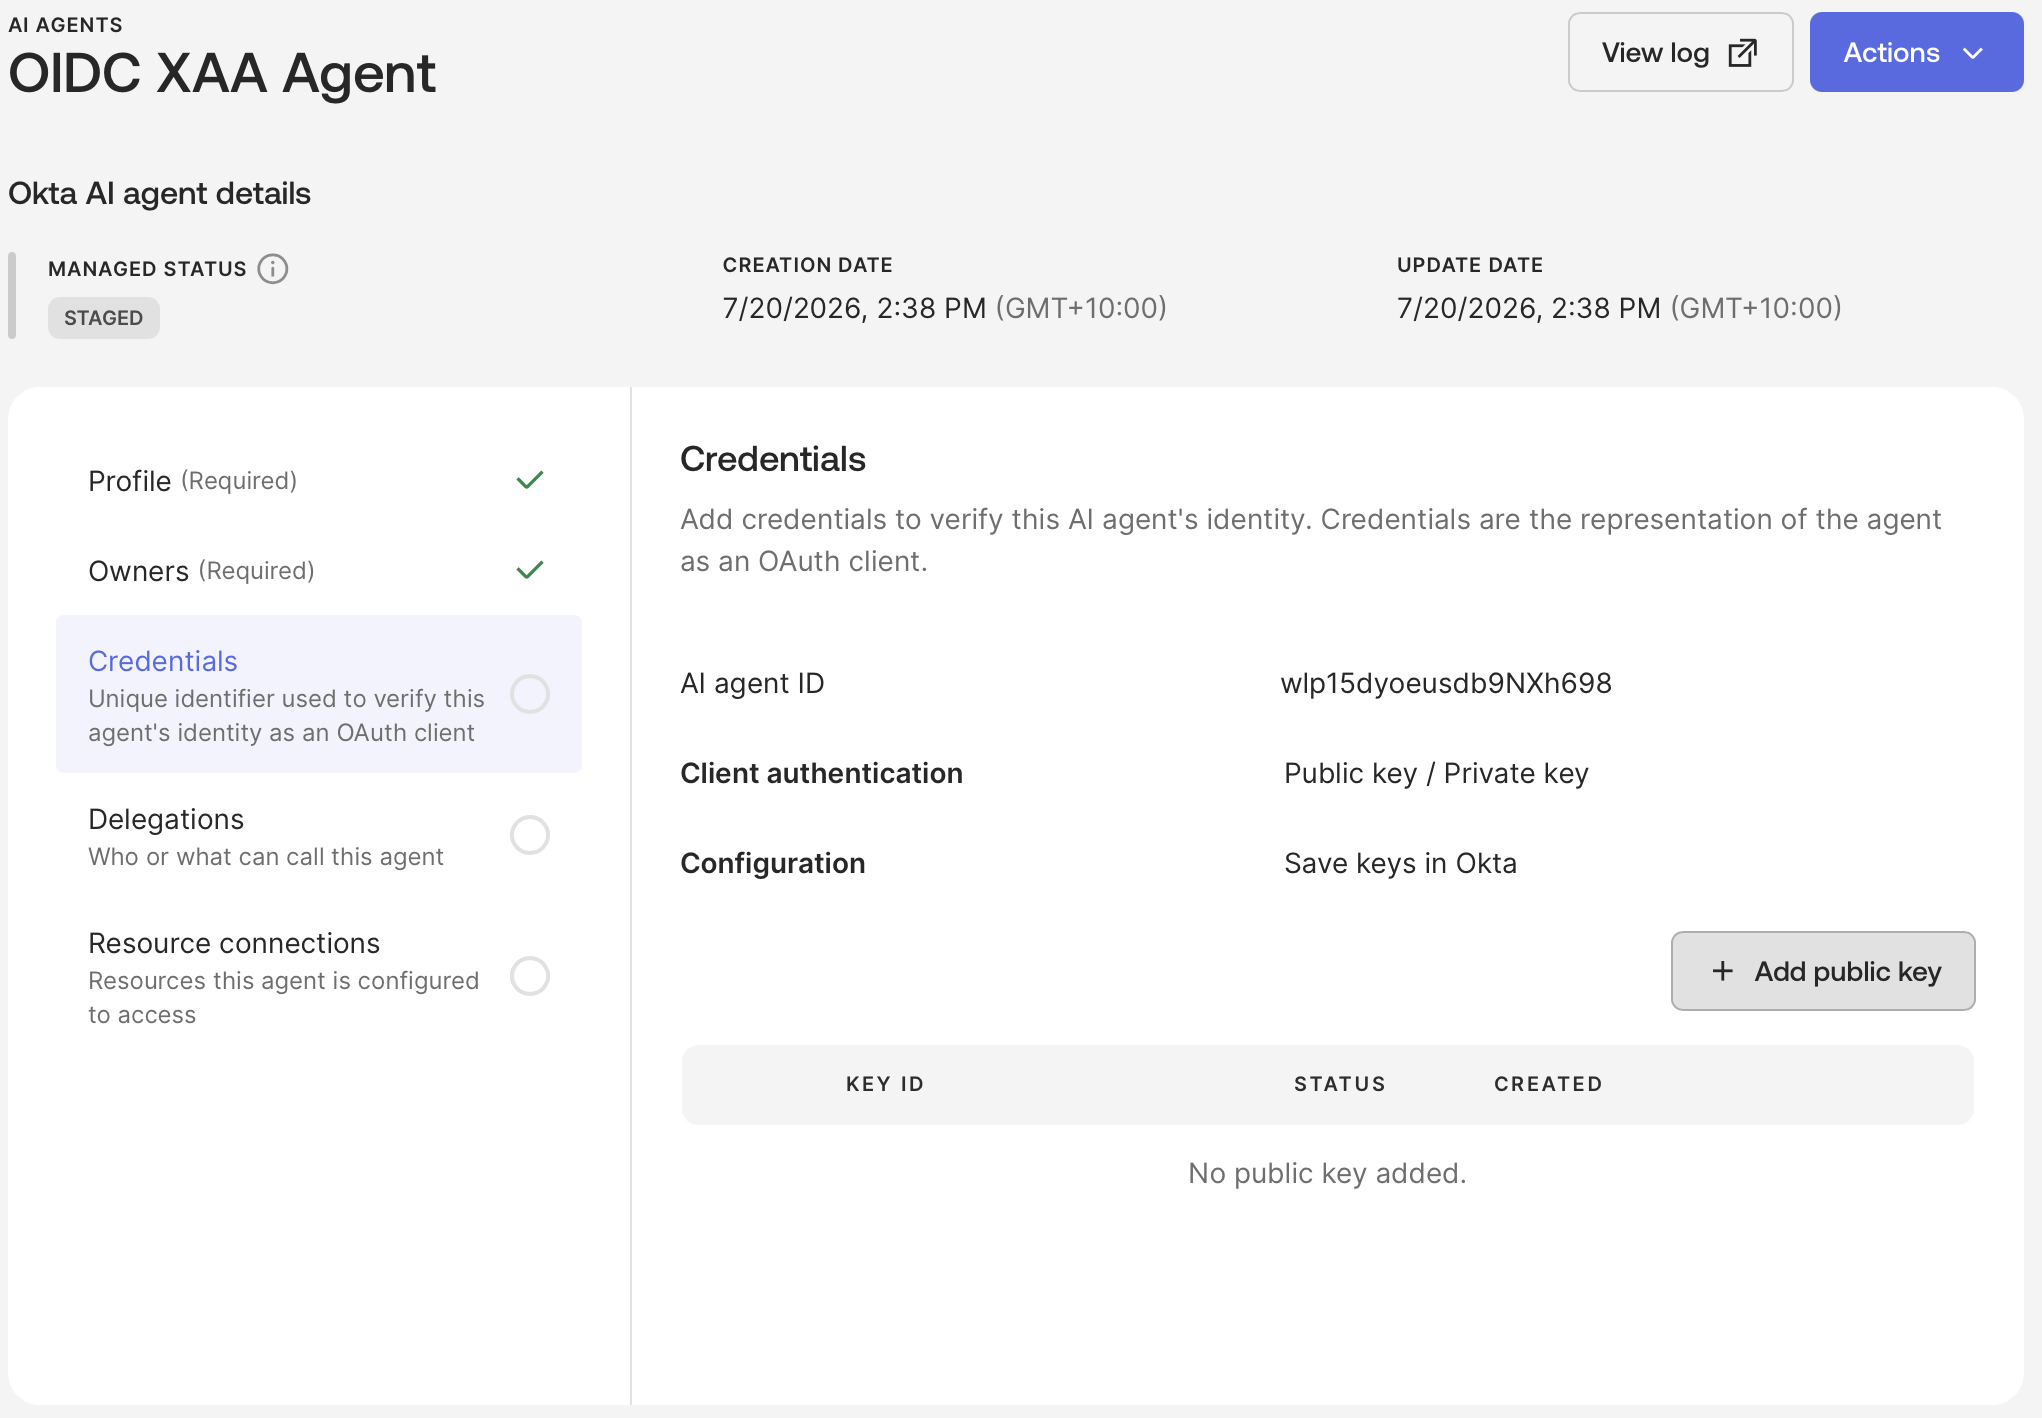 You can either provide a public key of your own key pair or select **Generate new key** and download its private key and key ID (`kid`).
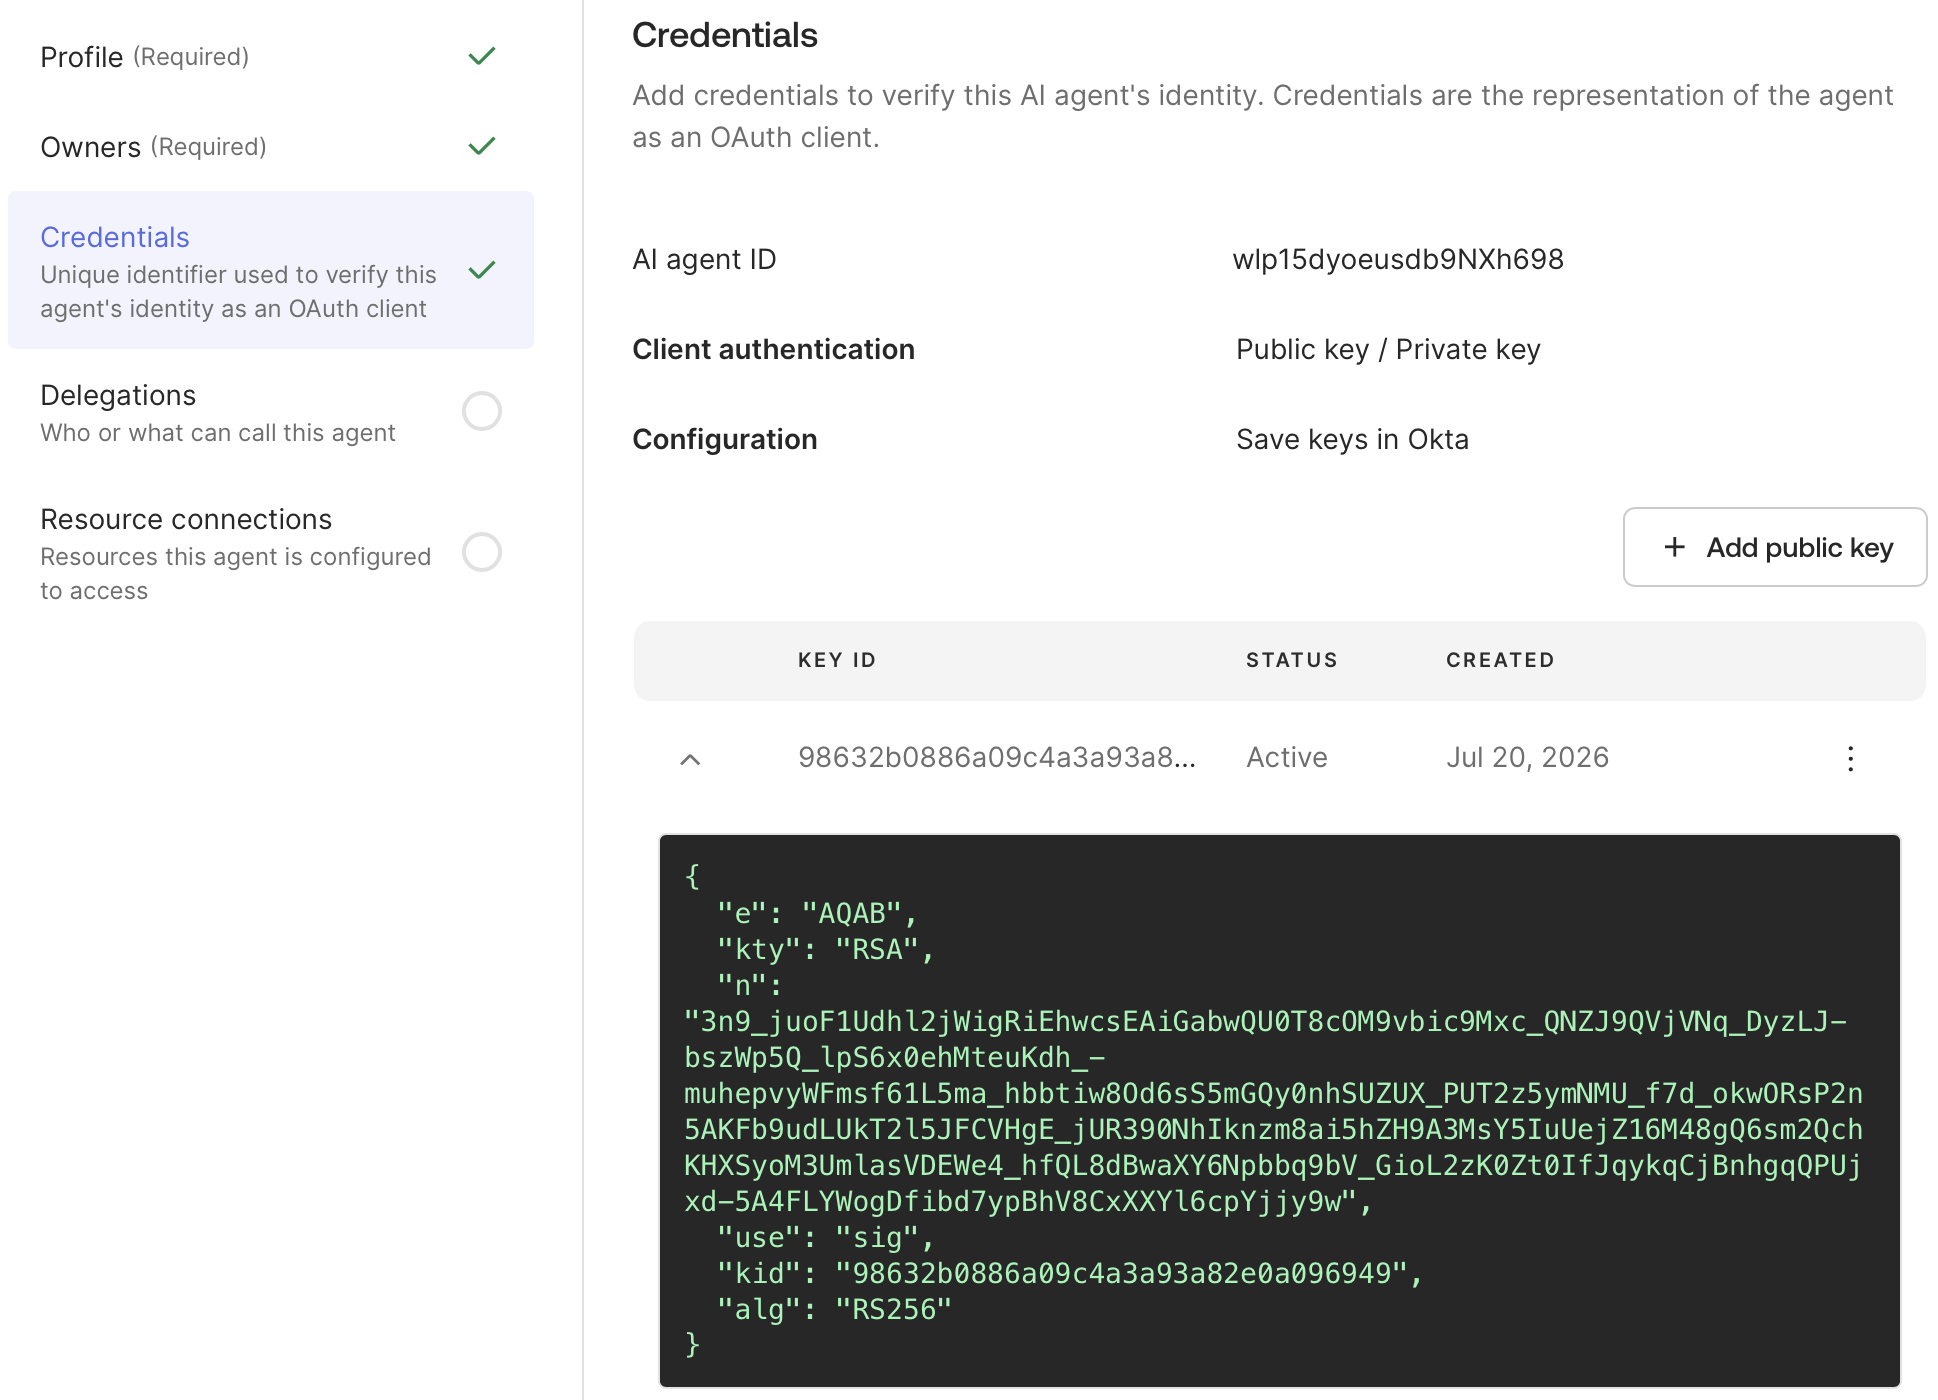
 Once you've set your credentials, a check appears on the side of the tab.
 ### Add Agent Delegations
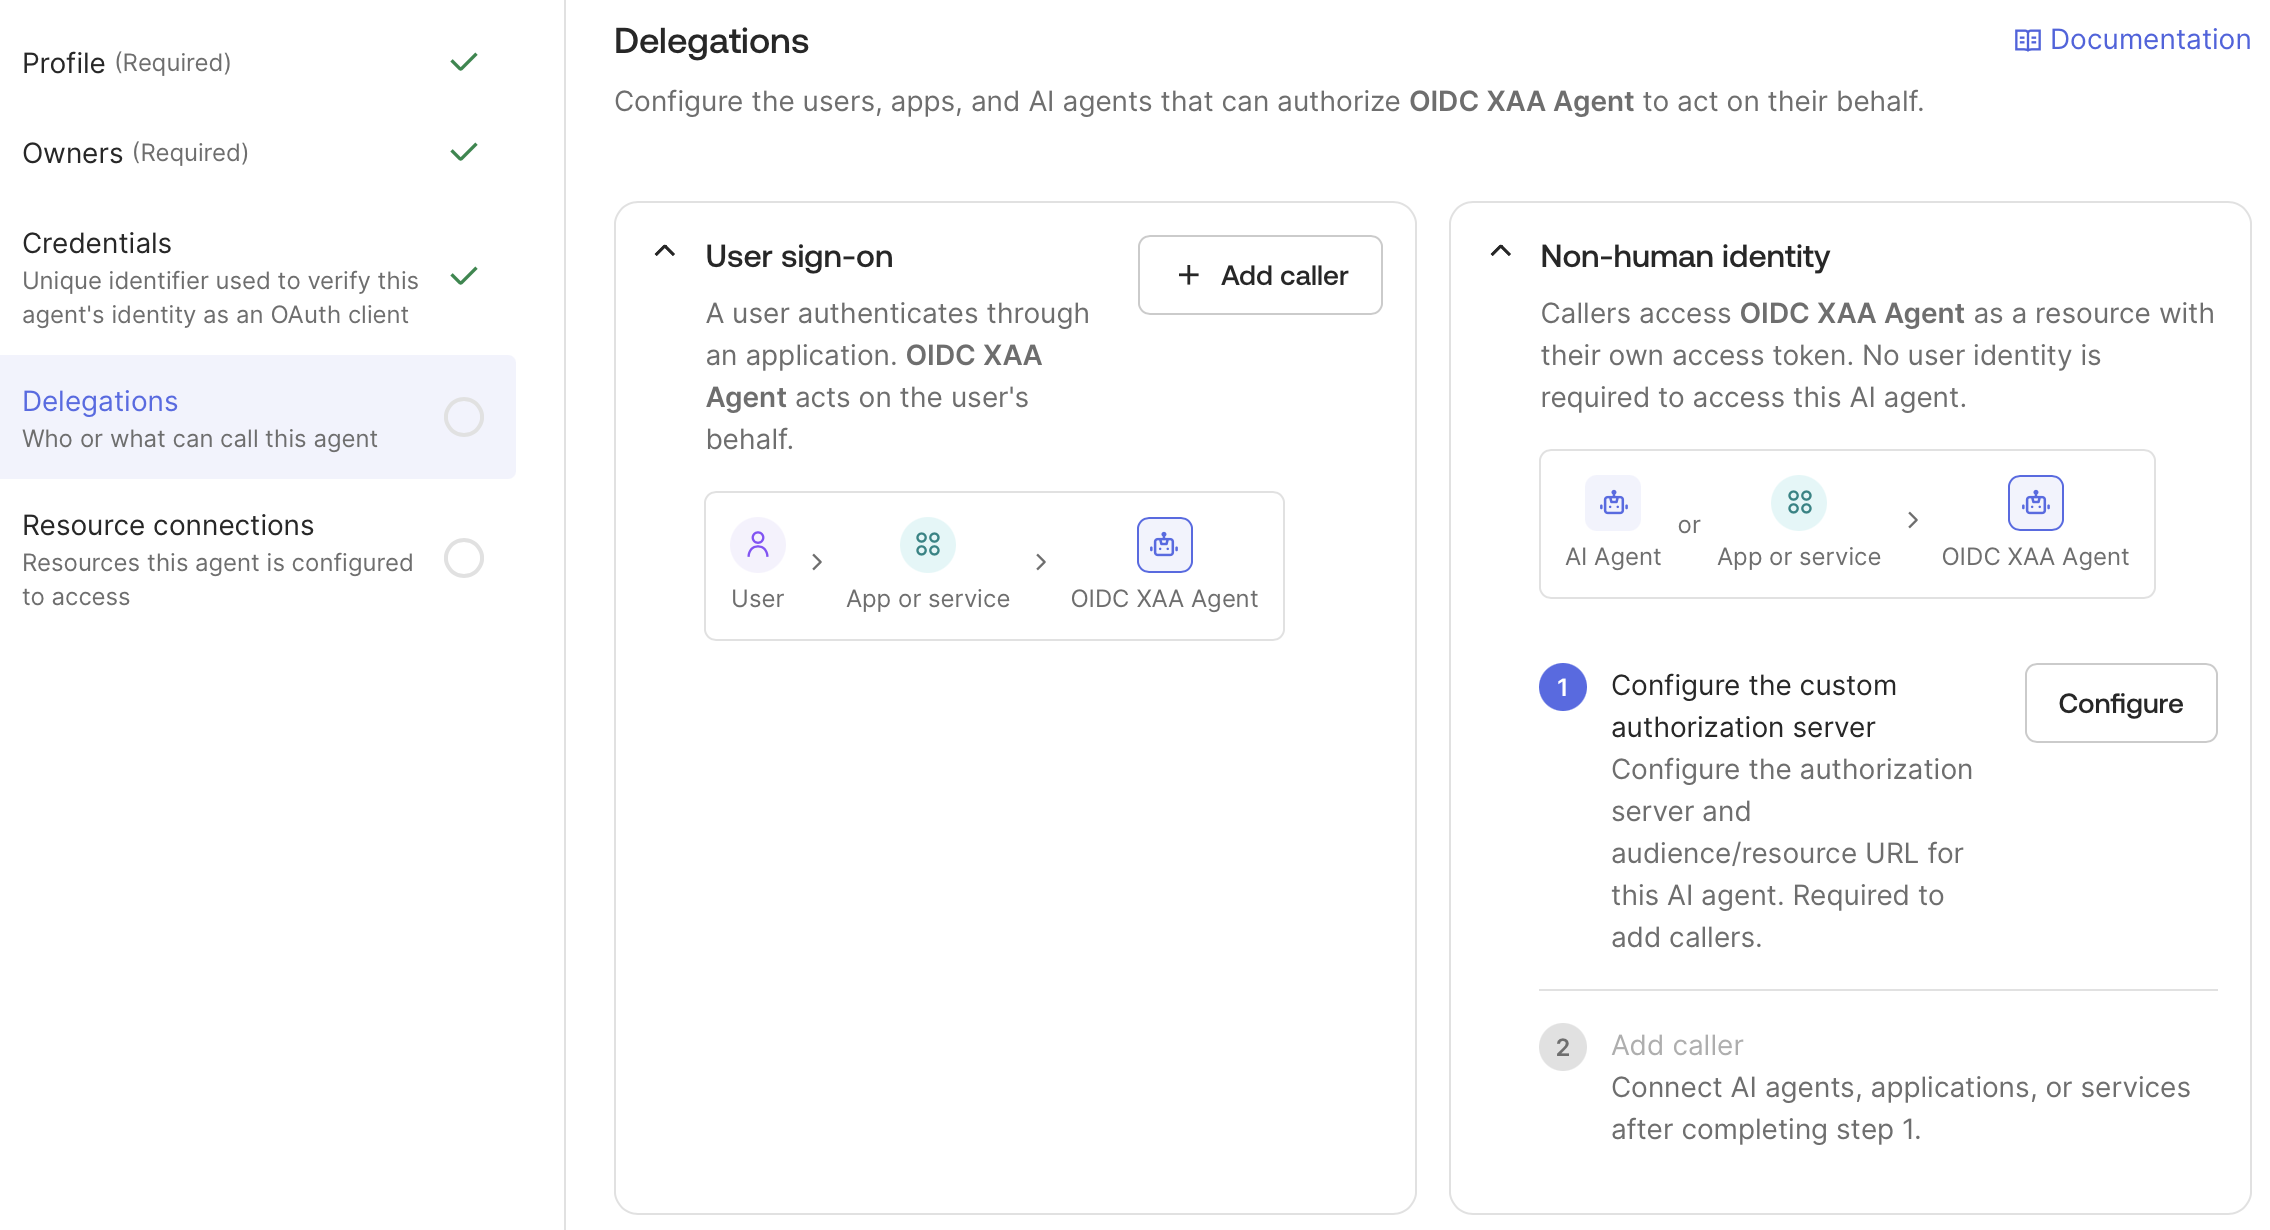
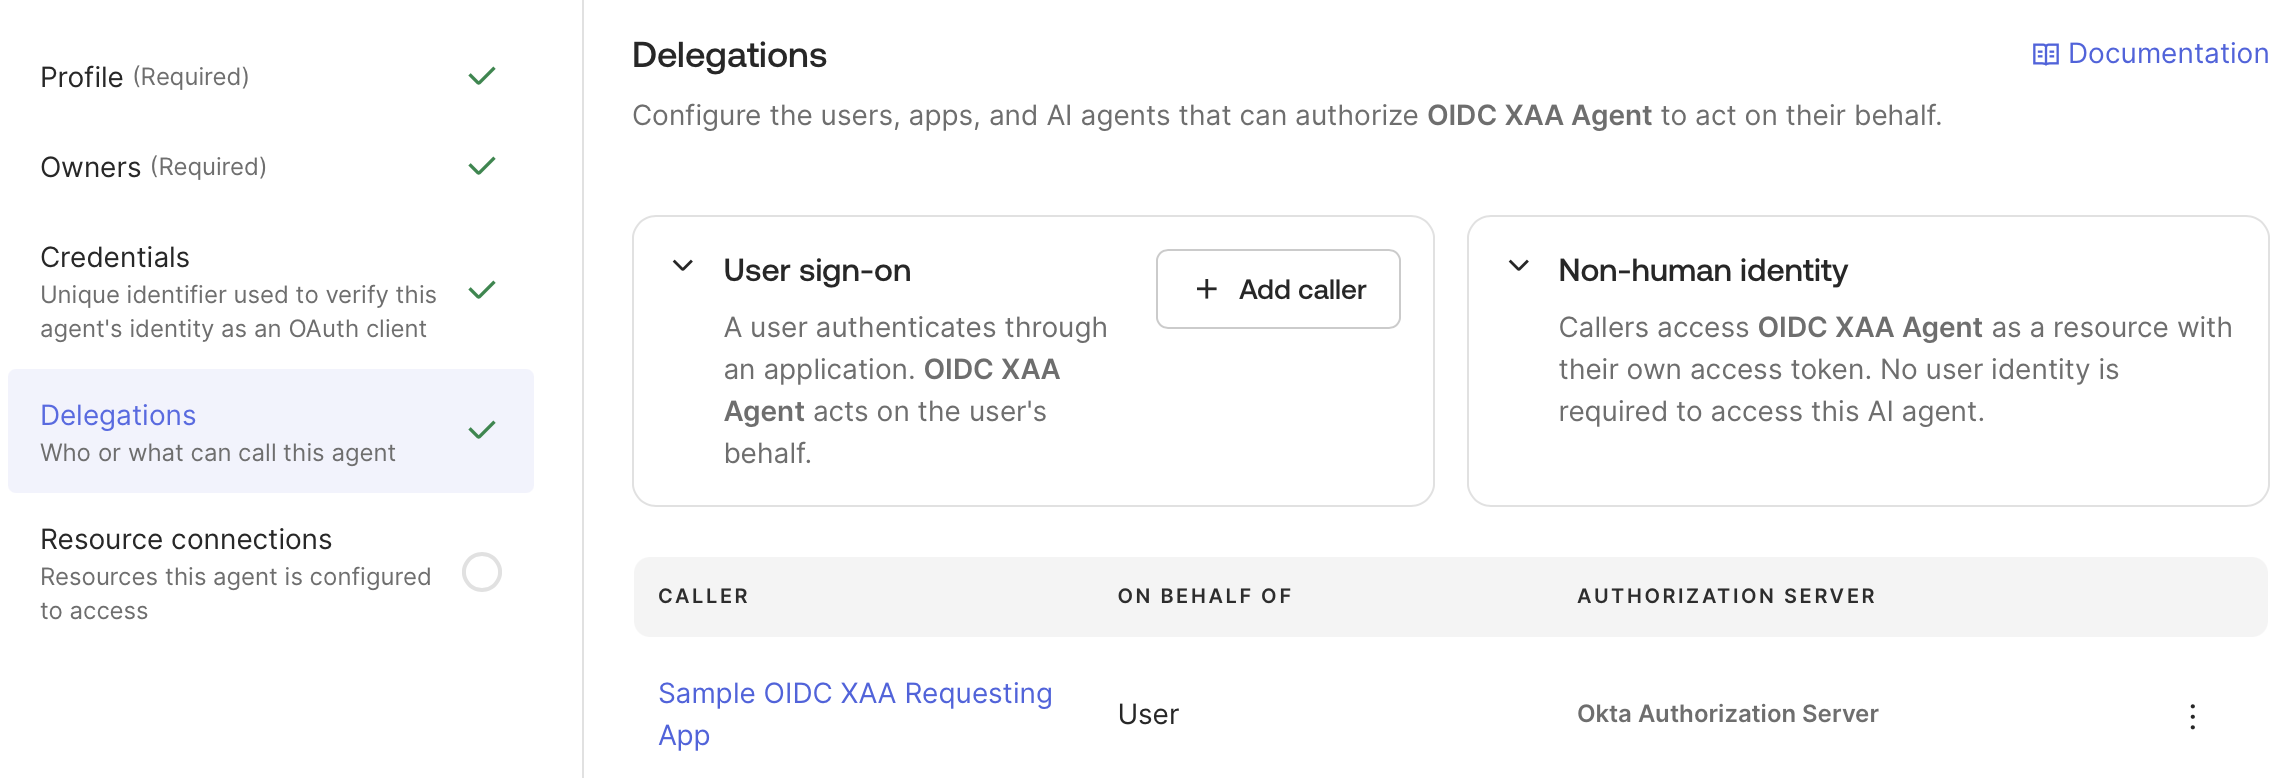
In the **Delegations** tab, select **Add Caller** in the **User sign-on** section.
### Add Agent Delegations
In the **Delegations** tab, select **Add Caller** in the **User sign-on** section.
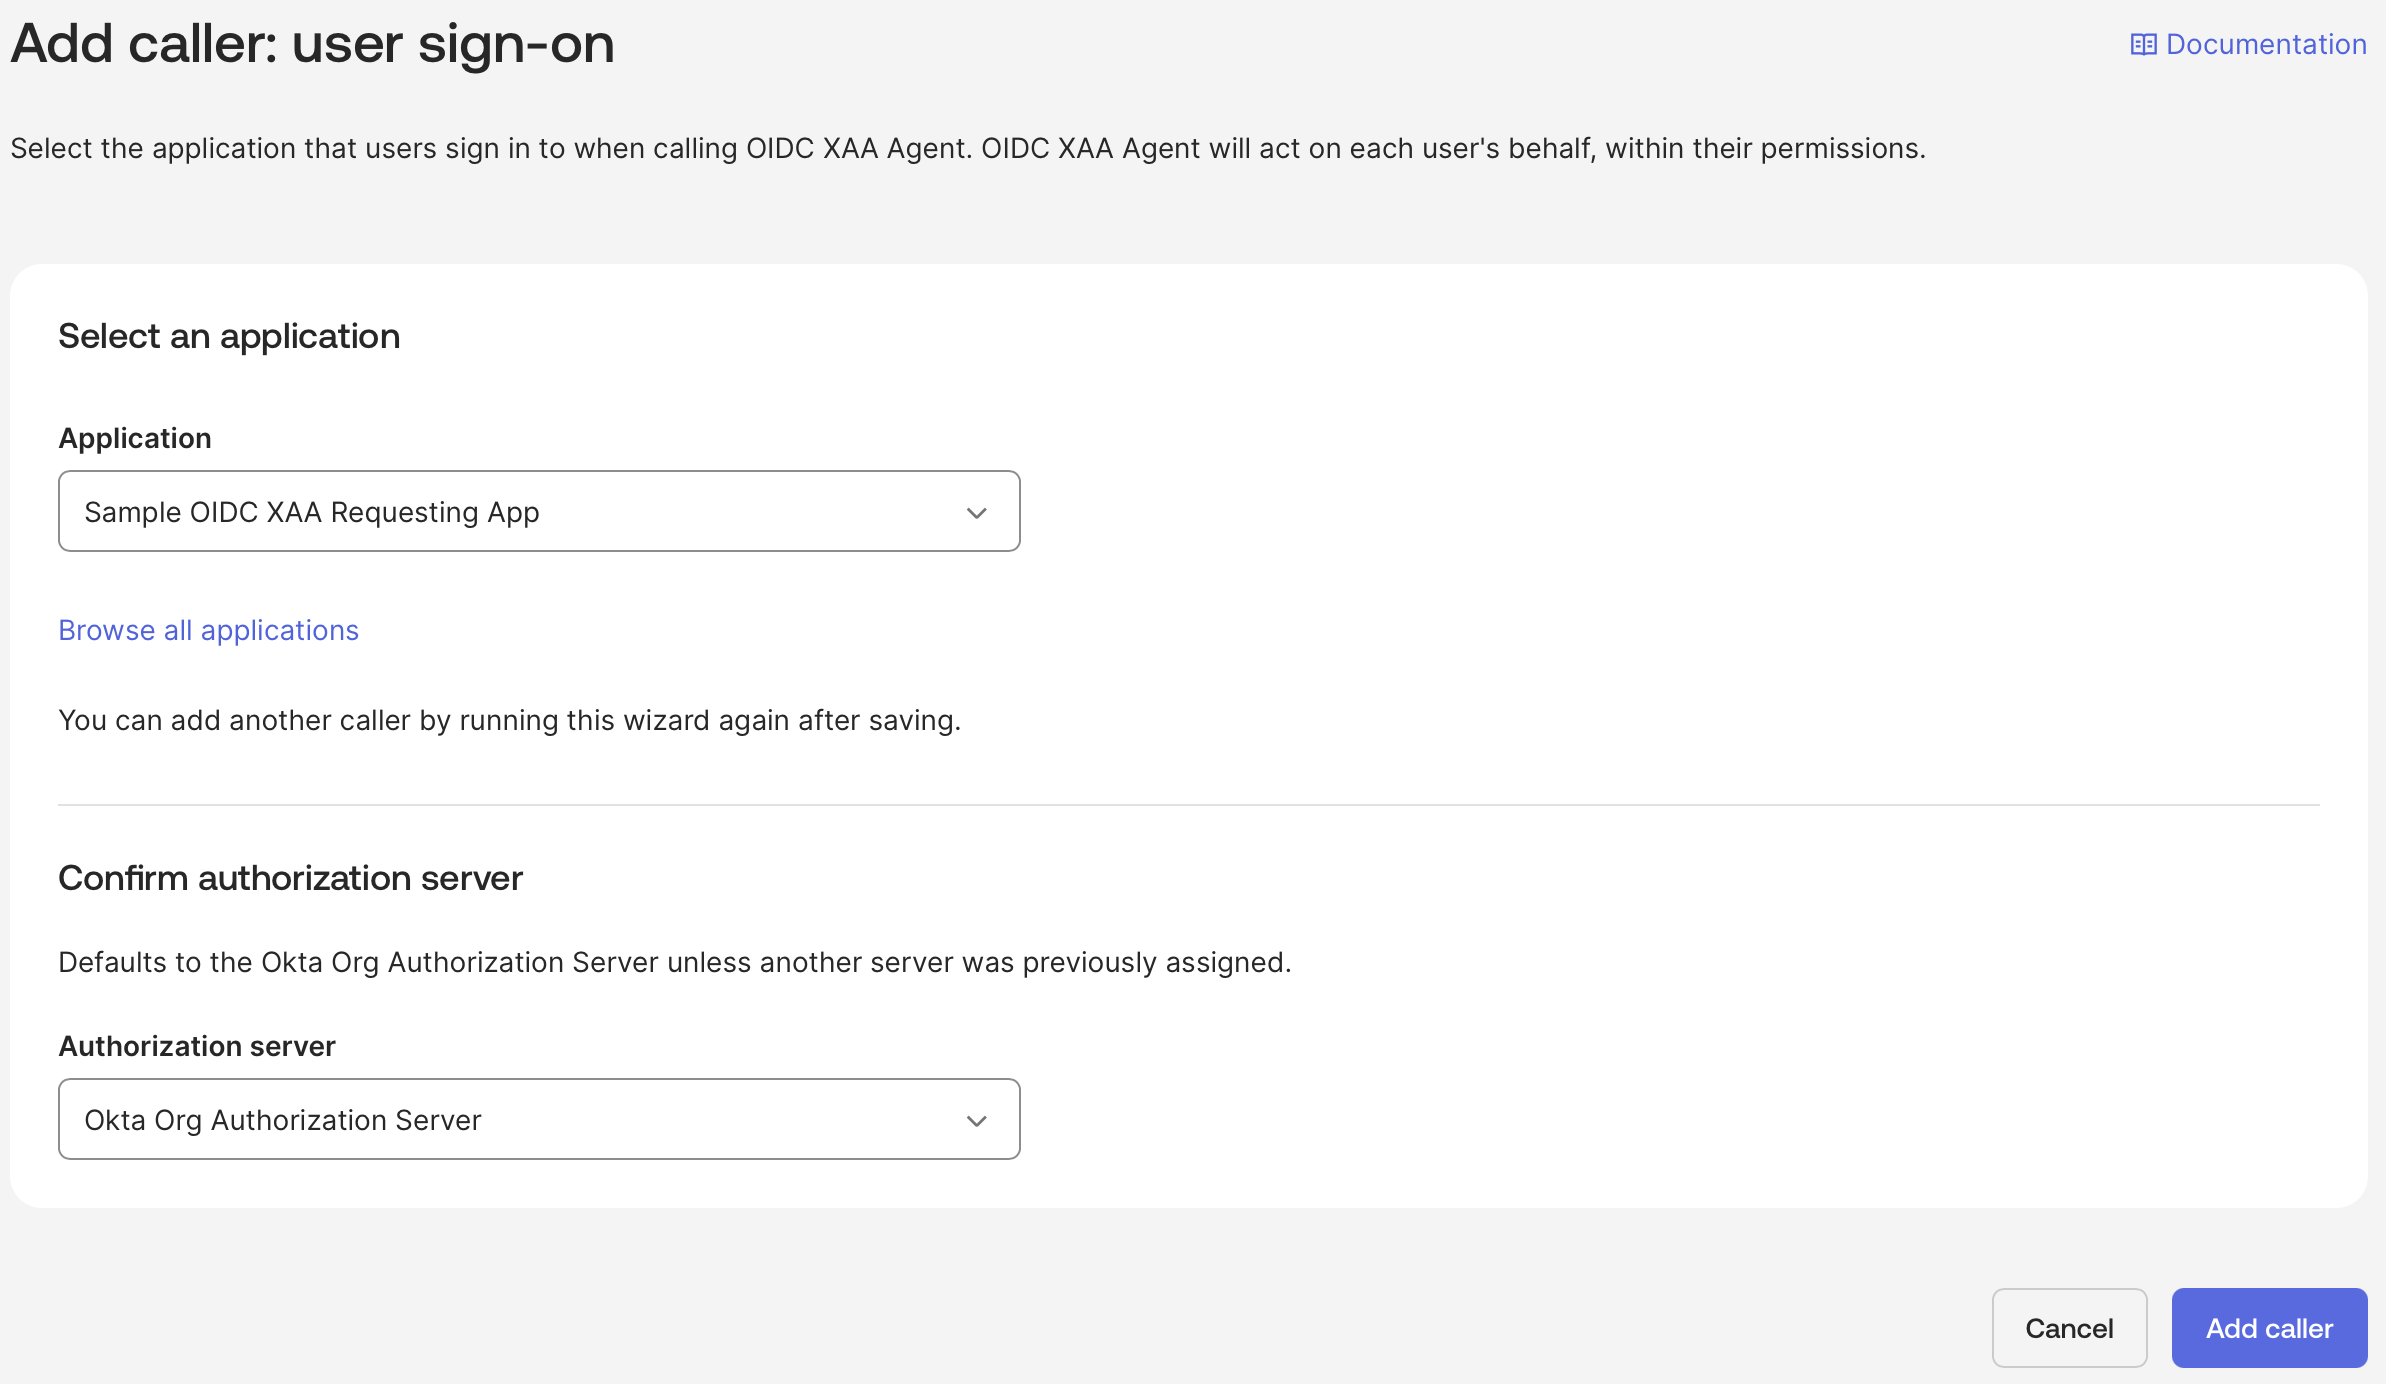
 Select the Requesting Application you created and **Okta Authorization Server** as the authorization server.
 Once you've set your agent delegations, a check appears on the side of the tab.
 ### Add Agent Resource connections
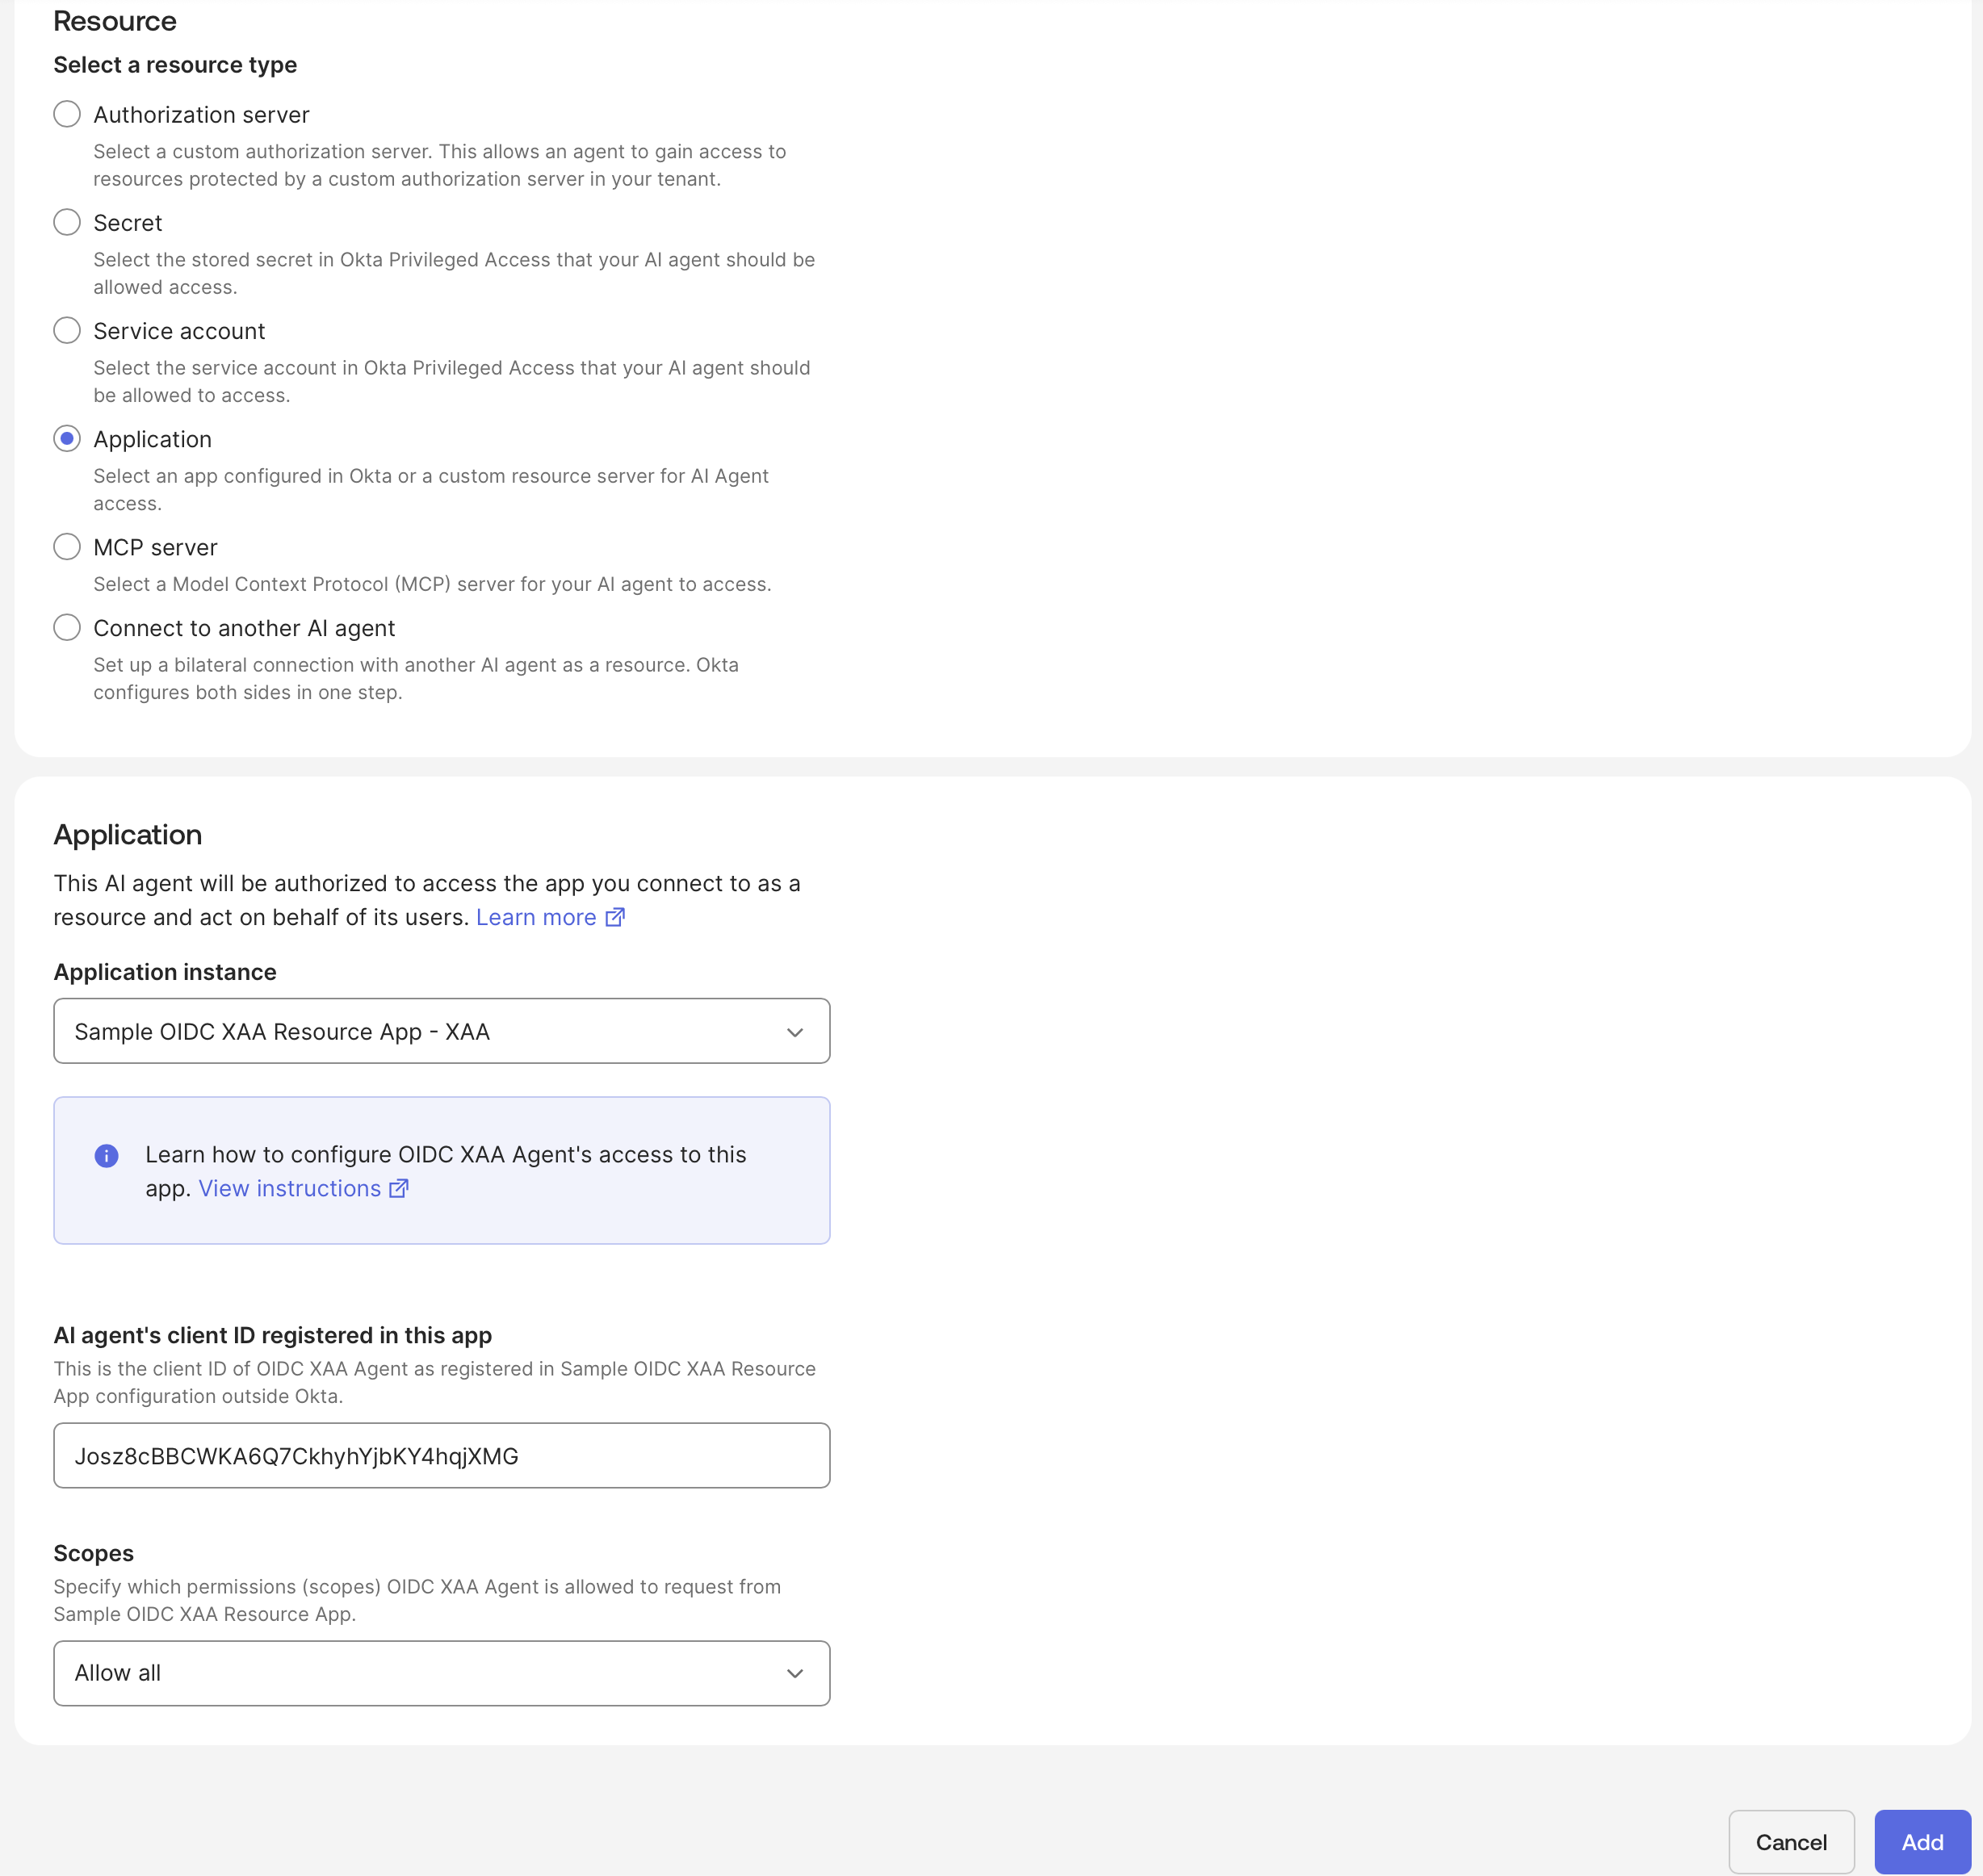
In the **Resource connections** tab, select **Add resource connections** and select **Application** as the **Resource type**.
In the **Application** section, select the Resource App you created and set **AI agent's client ID registered in the app** to the `client_id` of the Agent0 application in your Auth0 tenant.
### Add Agent Resource connections
In the **Resource connections** tab, select **Add resource connections** and select **Application** as the **Resource type**.
In the **Application** section, select the Resource App you created and set **AI agent's client ID registered in the app** to the `client_id` of the Agent0 application in your Auth0 tenant.
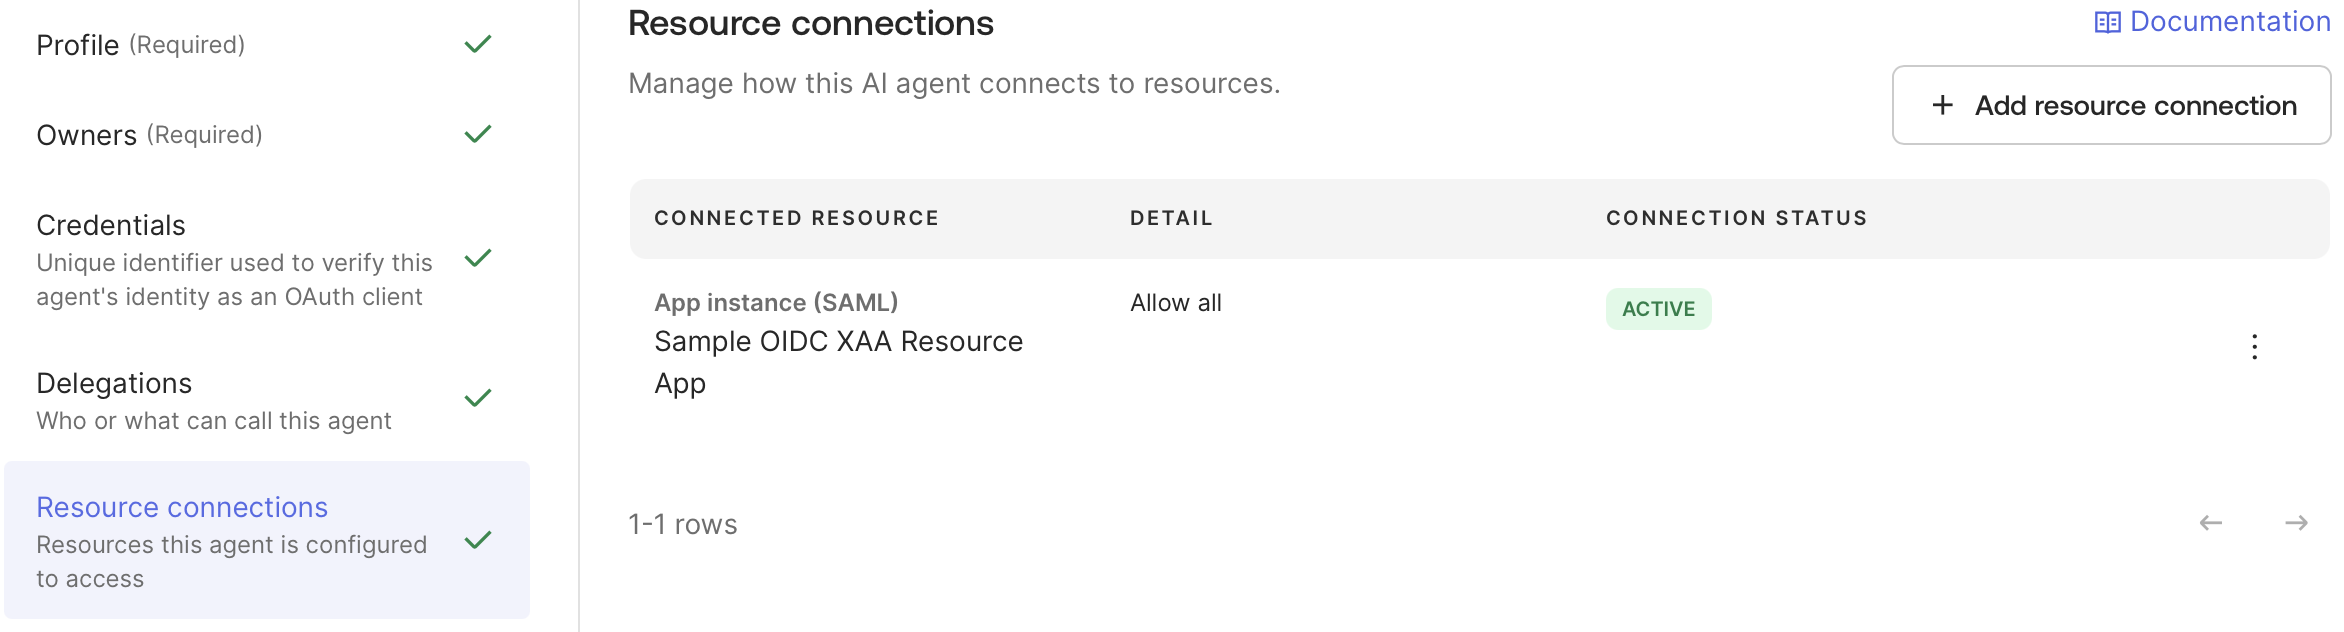
 Once you've set your resource connections, a check appears on the side of the tab.
 ### Activate the Agent
From the **Agent's Actions** drop down, select **Activate** and check that **MANAGED STATUS** is **Active**.
## Configure an Okta Workforce Enterprise connection in Auth0
Use your Resource App’s `client_id` and `client_secret` to [create an Okta Workforce Enterprise connection](/docs/authenticate/identity-providers/enterprise-identity-providers/okta/express-configuration) in your Auth0 tenant.
In your Auth0 Dashboard, go to **Authentication > Enterprise > Okta Workforce** and select **Create Connection**.
### Activate the Agent
From the **Agent's Actions** drop down, select **Activate** and check that **MANAGED STATUS** is **Active**.
## Configure an Okta Workforce Enterprise connection in Auth0
Use your Resource App’s `client_id` and `client_secret` to [create an Okta Workforce Enterprise connection](/docs/authenticate/identity-providers/enterprise-identity-providers/okta/express-configuration) in your Auth0 tenant.
In your Auth0 Dashboard, go to **Authentication > Enterprise > Okta Workforce** and select **Create Connection**.
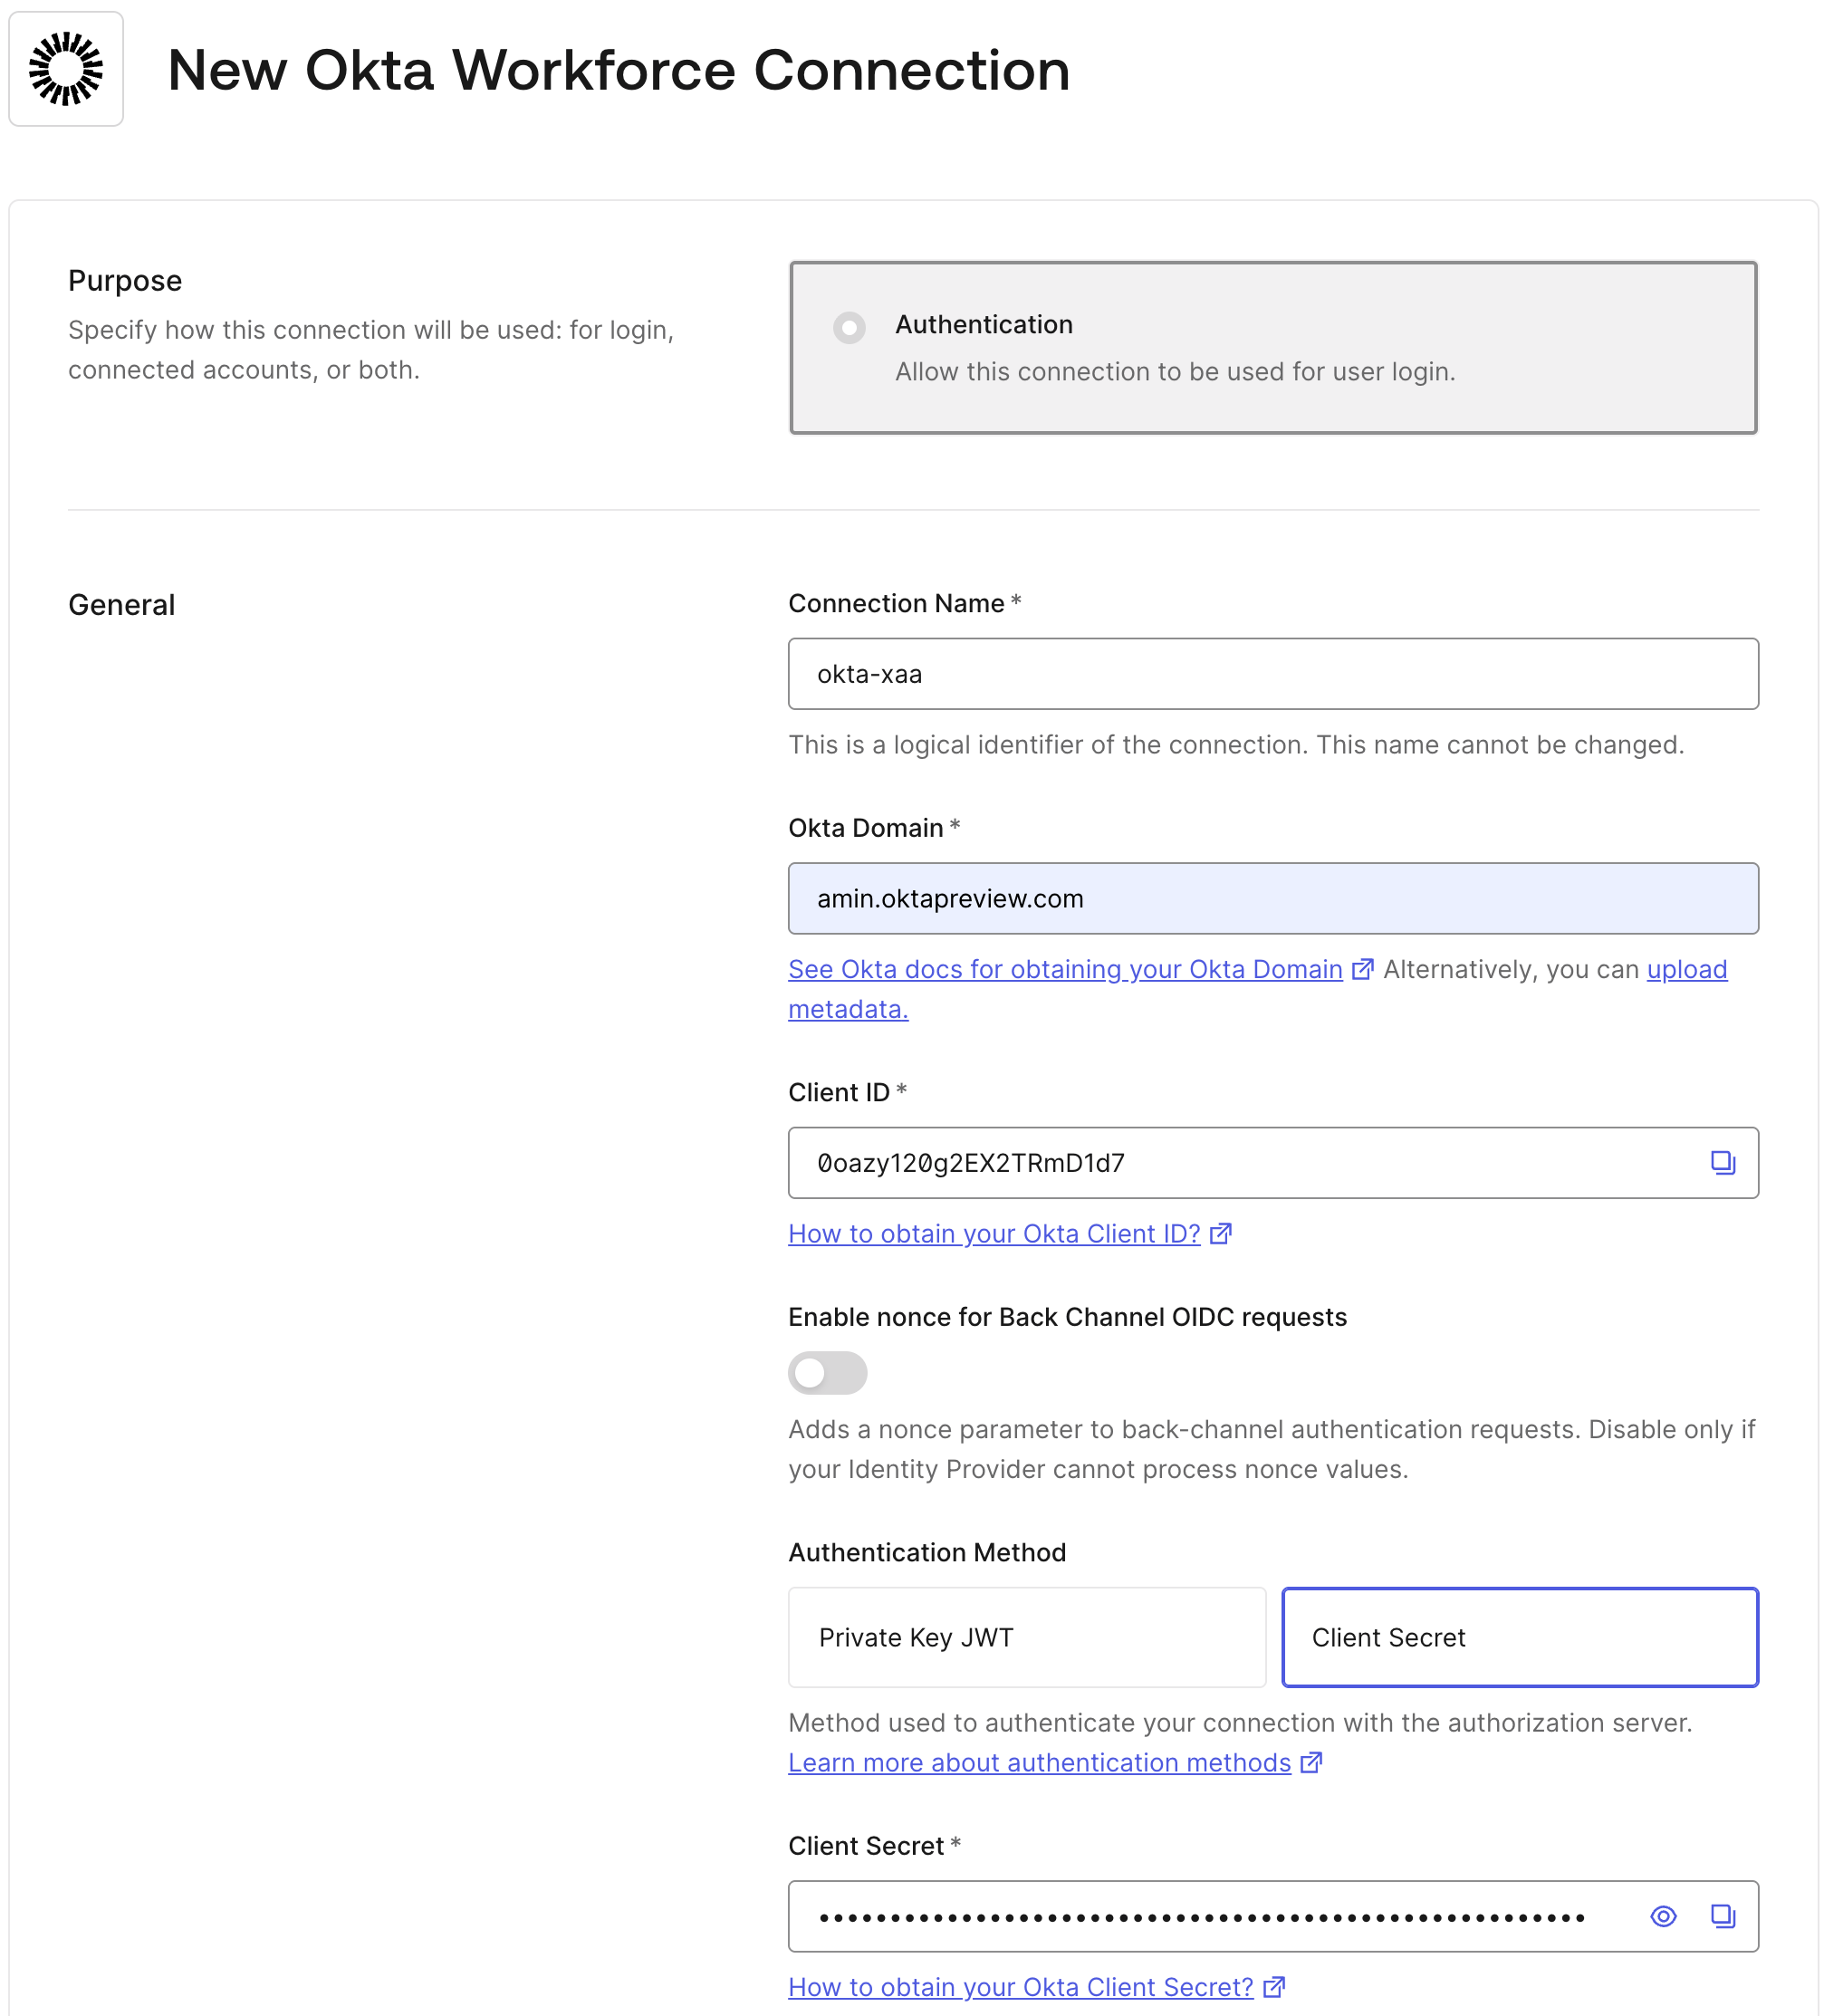 When creating the Okta Workforce Enterprise connection, activate the **Cross App Access - Resource Application** role. This enables your Resource App to accept ID-JAGs issued by the enterprise IdP associated with that connection, in this case, your Okta tenant.
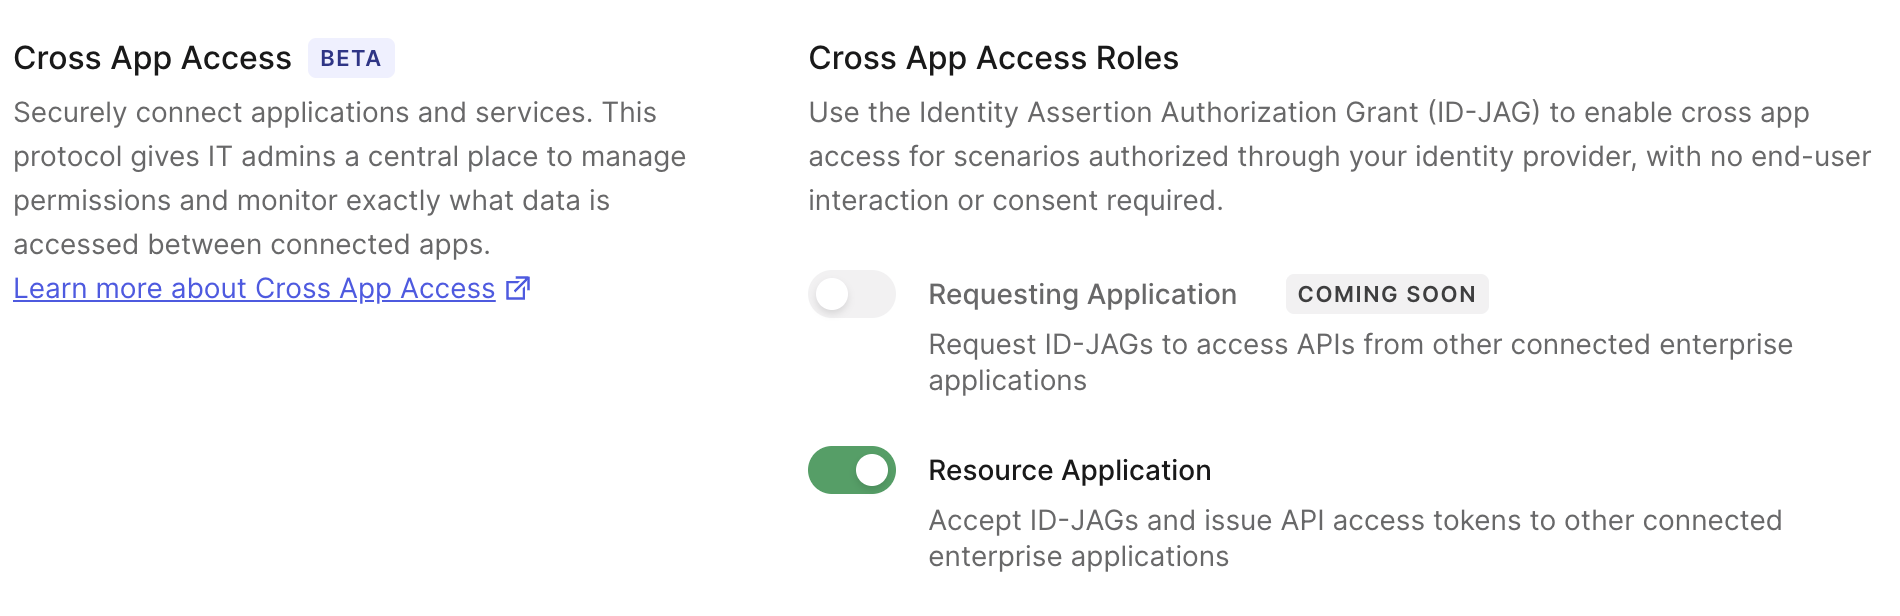 After creating the Okta Workforce Enterprise connection, check that the **Callback URL provided by Auth0** in the connection's settings matches the **Redirect URI** configured in the sign-on policies of the **Resource App** in your Okta tenant.
### Test Connection in Auth0
In the Auth0 Dashboard:
* Navigate to **Authentication > Enterprise > Okta Workforce**:
* Enter the Okta Workforce Enterprise connection you created and select the **Applications** tab. Then, enable the Requesting App you created for the connection.
* Go back to the list of Okta Workforce connections. Select the three dots on the right for your connection and select **Try**. You will be redirected to authenticate in your Okta tenant to complete the login with your test user.
After creating the Okta Workforce Enterprise connection, check that the **Callback URL provided by Auth0** in the connection's settings matches the **Redirect URI** configured in the sign-on policies of the **Resource App** in your Okta tenant.
### Test Connection in Auth0
In the Auth0 Dashboard:
* Navigate to **Authentication > Enterprise > Okta Workforce**:
* Enter the Okta Workforce Enterprise connection you created and select the **Applications** tab. Then, enable the Requesting App you created for the connection.
* Go back to the list of Okta Workforce connections. Select the three dots on the right for your connection and select **Try**. You will be redirected to authenticate in your Okta tenant to complete the login with your test user.
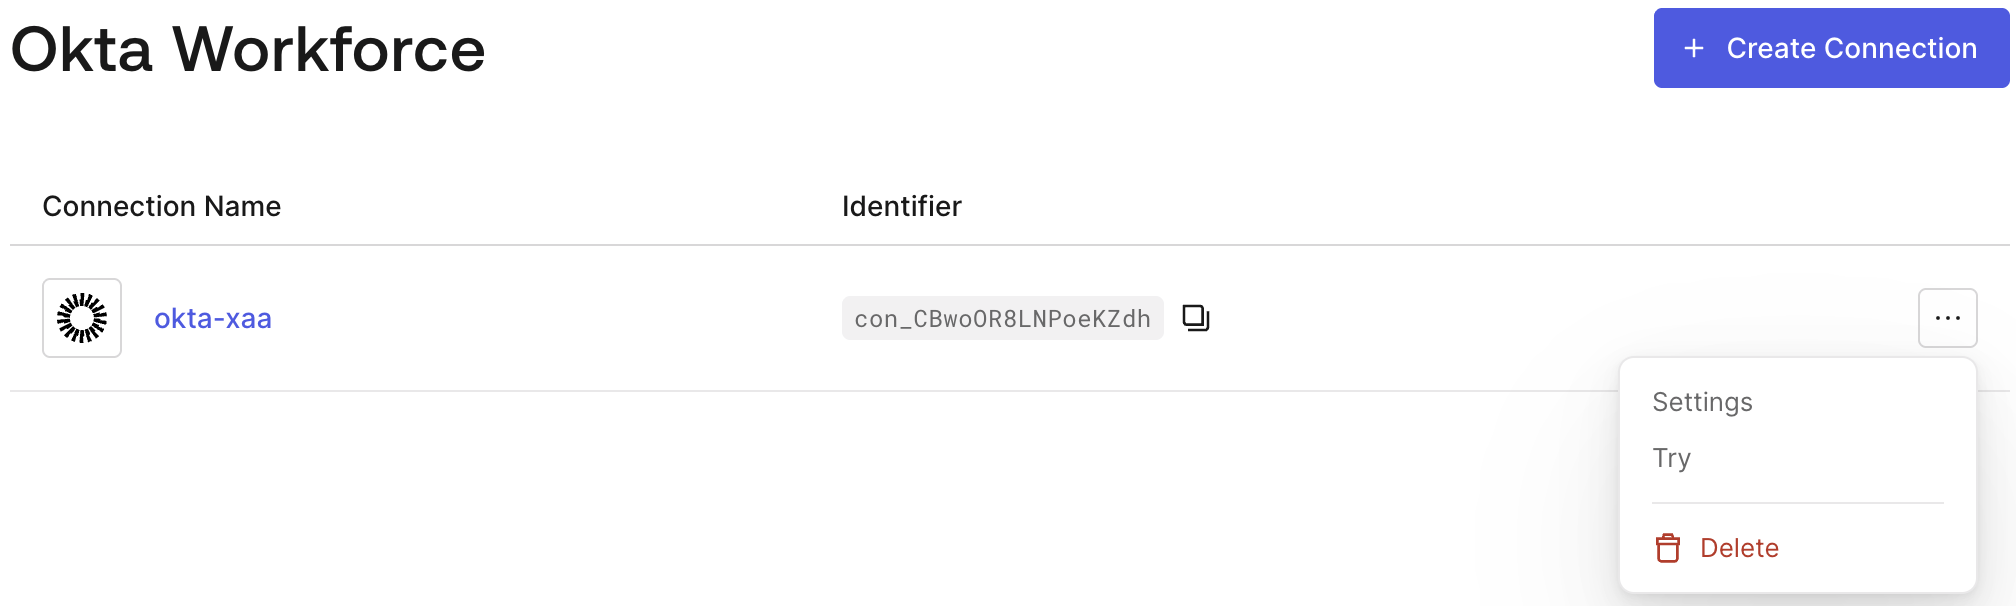 * Log in with the user you assigned to XAA Resource App
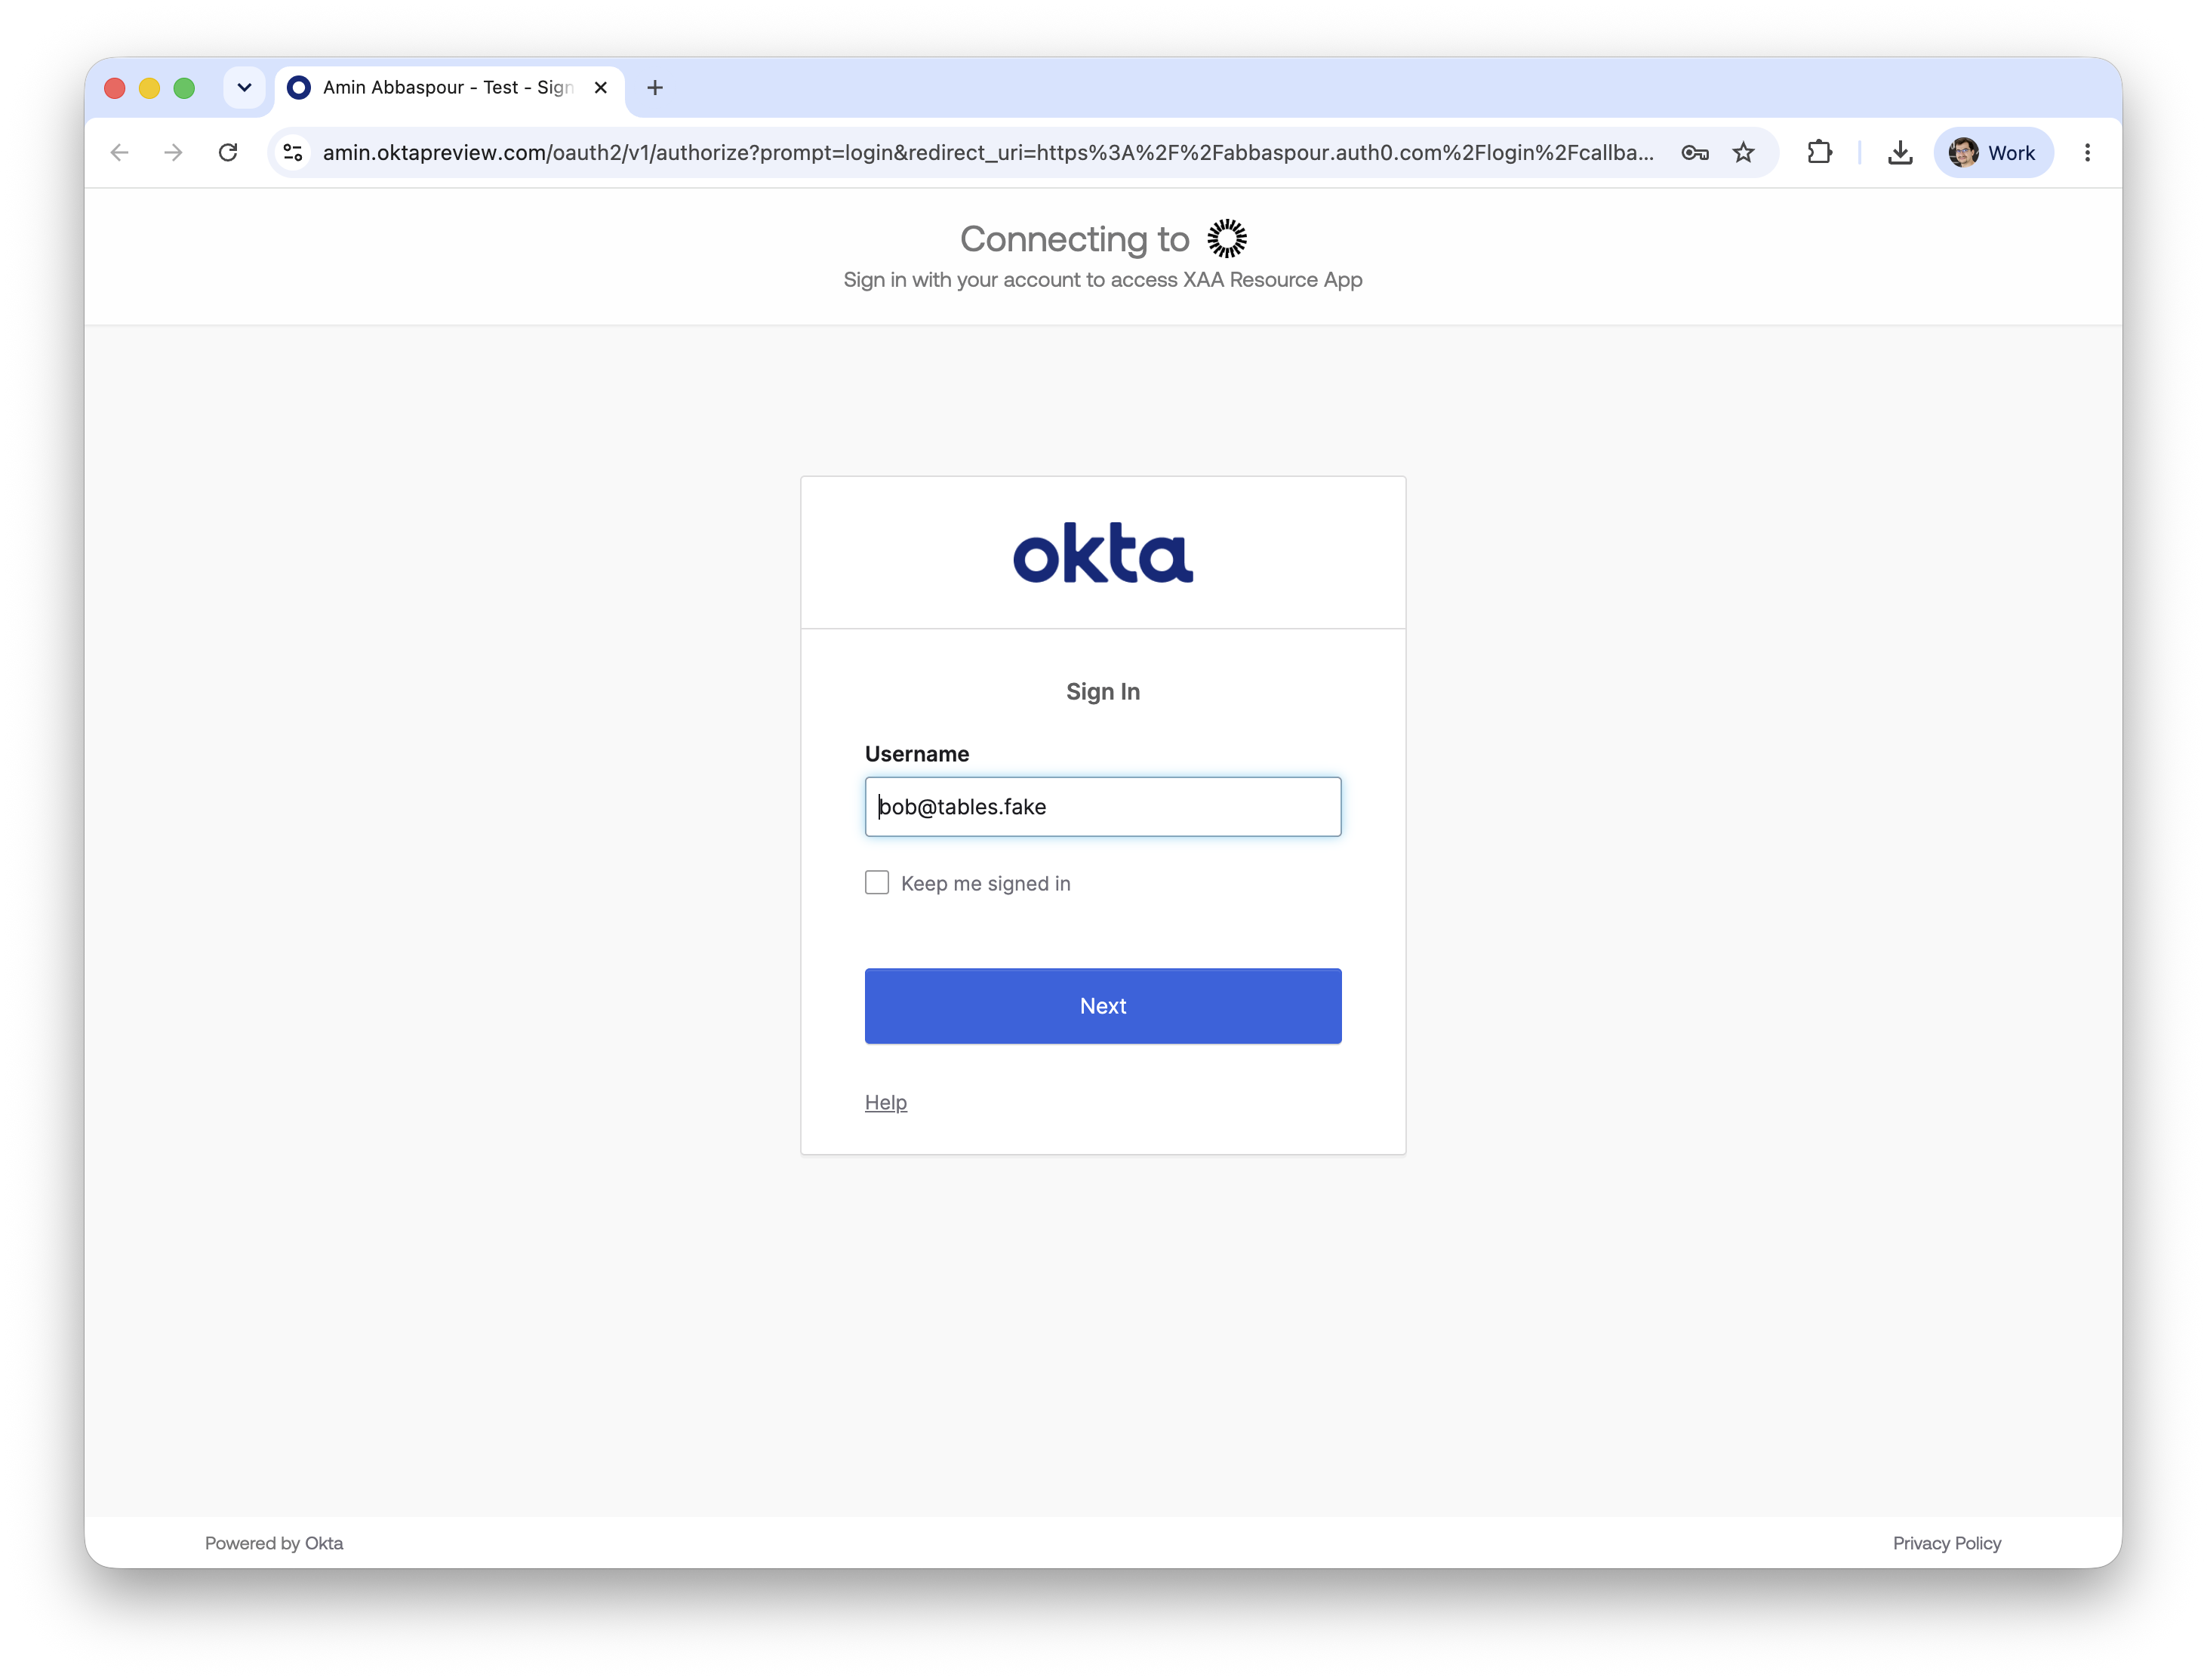 * Verify user login was successful
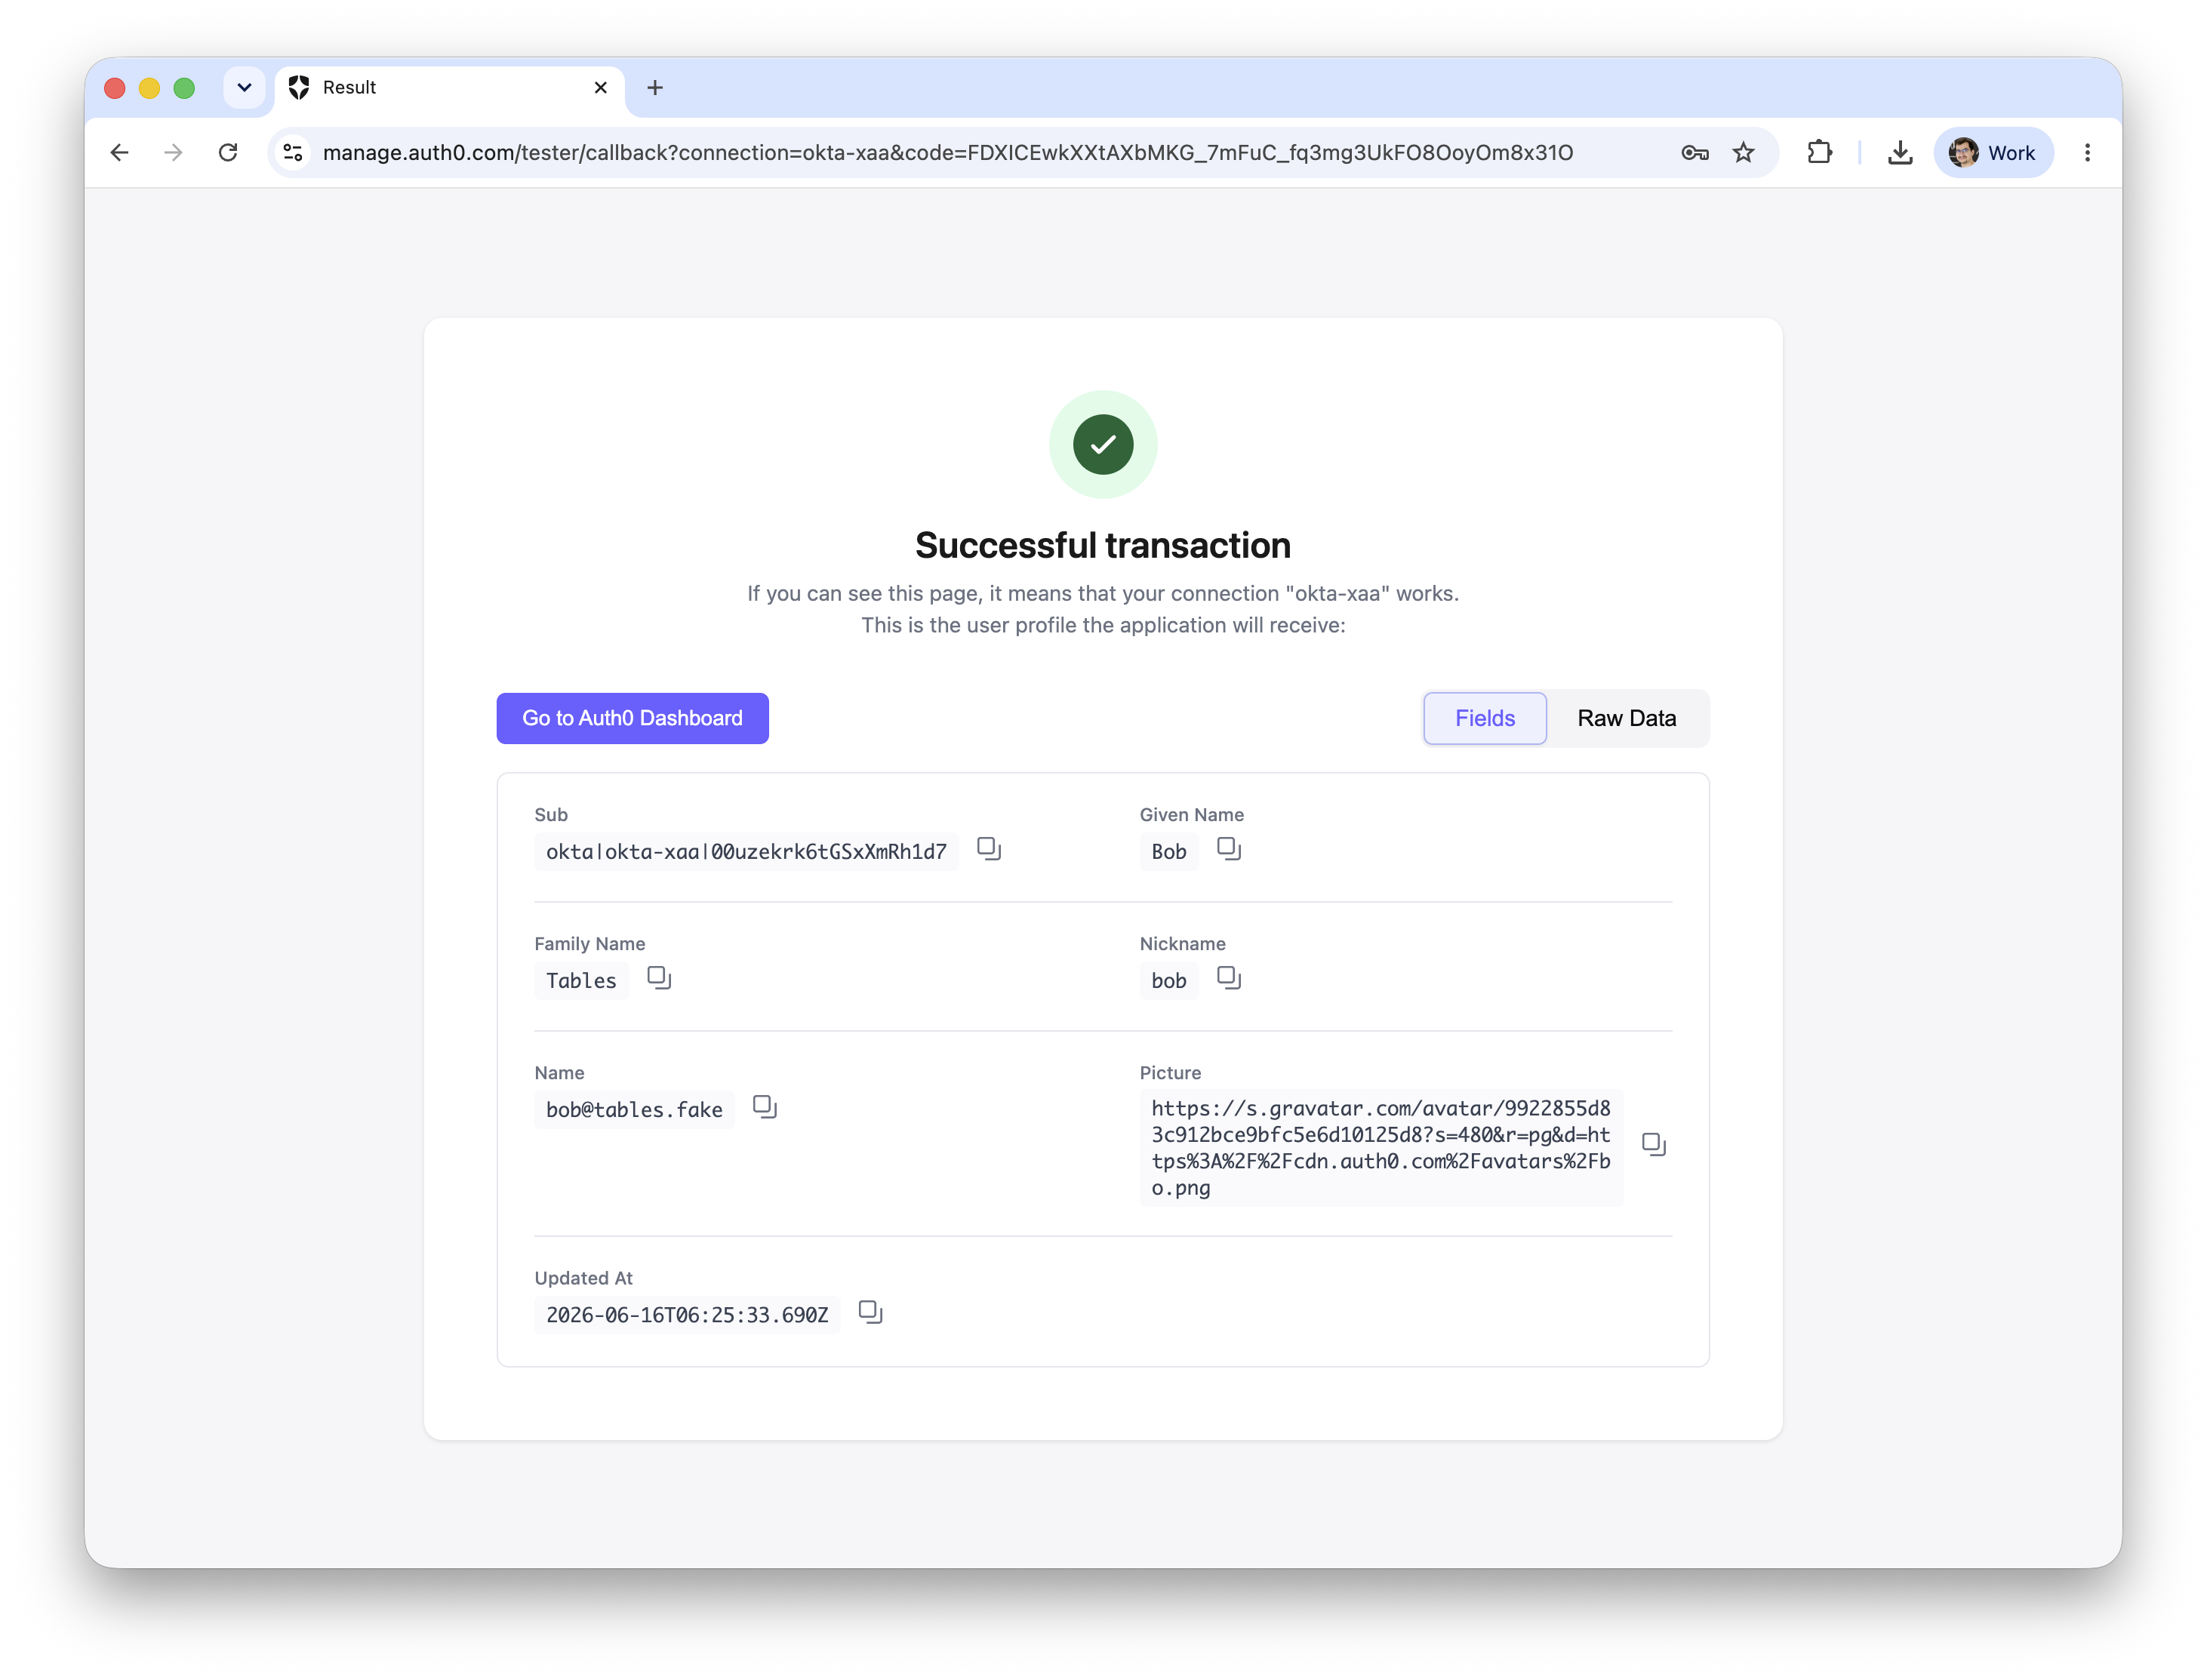 Once the user successfully logs in with the federated connection, their user profile is created in Auth0.
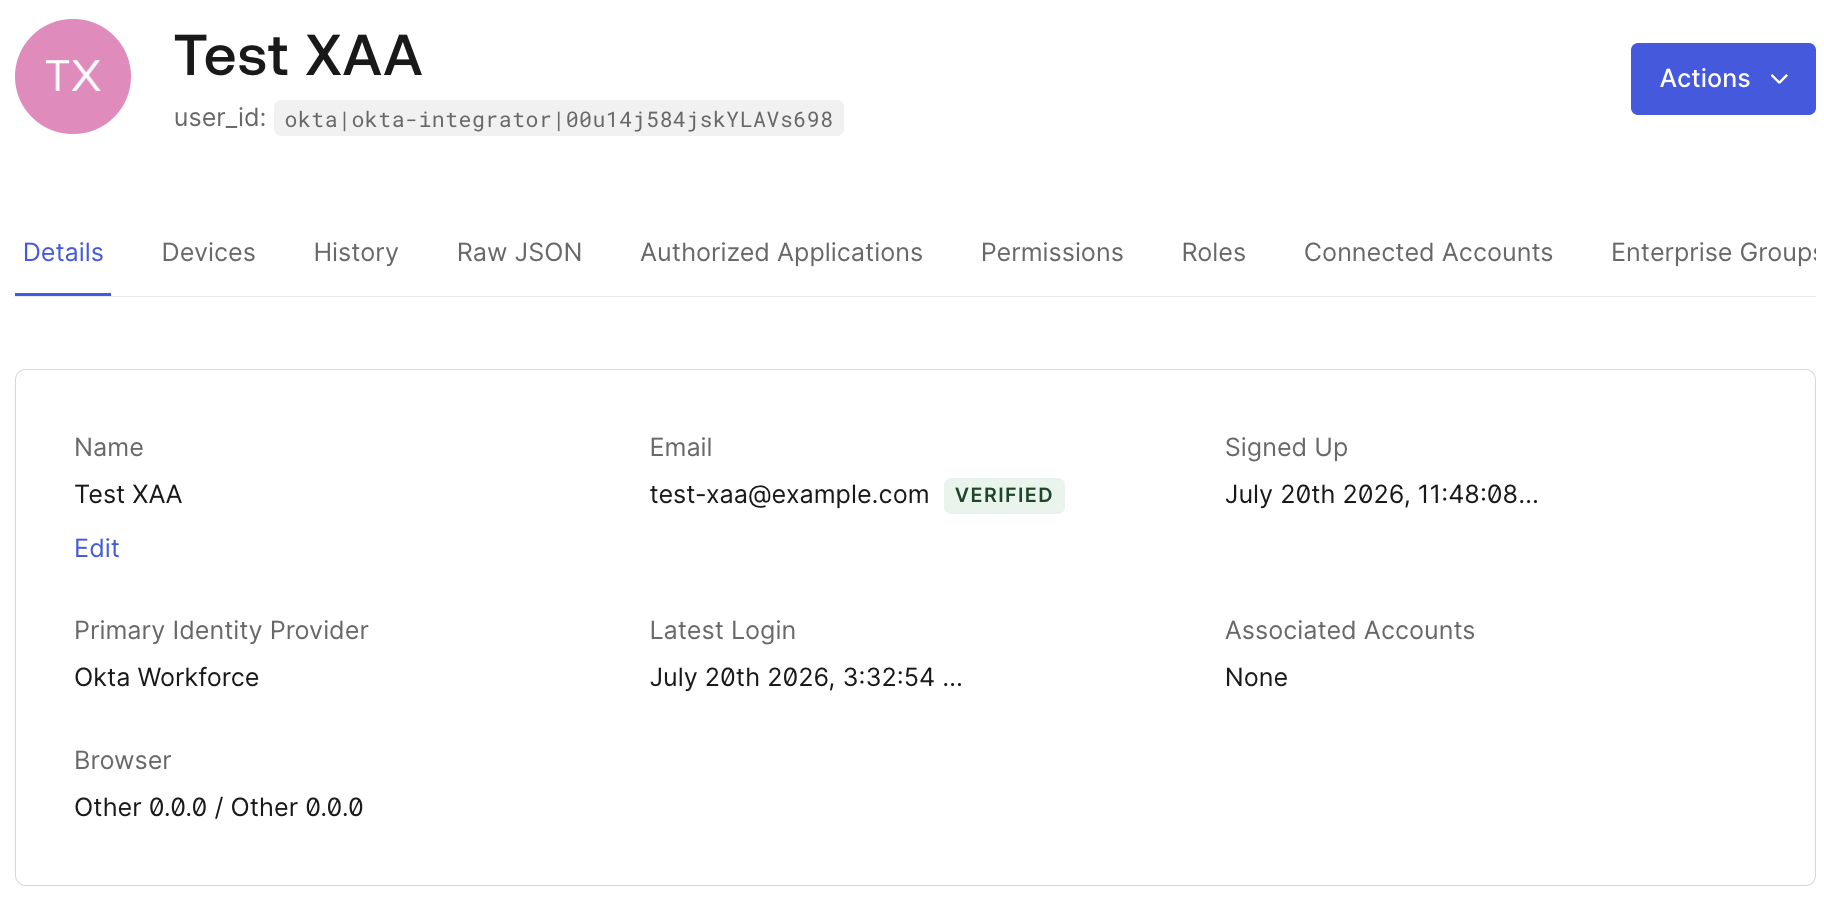 Users must log in with a XAA-enabled enterprise connection at least once so that the user profile exists in Auth0.
Auth0 does not support JIT user creation with ID-JAG at the moment.
Users must log in with a XAA-enabled enterprise connection at least once so that the user profile exists in Auth0.
Auth0 does not support JIT user creation with ID-JAG at the moment.