Prerequisites
Before beginning:-
Register your Application with Auth0.
- Select an appropriate Application Type.
- Add an Allowed Callback URL of
{https://yourApp/callback}. - Make sure your Application’s Grant Types include the appropriate flows.
-
Decide on the name of this enterprise connection
- The Post-back URL (also called Assertion Consumer Service URL) becomes:
https://{yourDomain}/login/callback?connection={yourConnectionName} - The Entity ID becomes:
urn:auth0:{yourTenant}:{yourConnectionName}
- The Post-back URL (also called Assertion Consumer Service URL) becomes:
Steps
To connect your application to a SAML Identity Provider, you must:- Enter the Post-back URL and Entity ID at the IdP (to learn how, read about SAML Identity Provider Configuration Settings).
- Get the signing certificate from the IdP and convert it to Base64.
- Create an enterprise connection in Auth0.
- Enable the enterprise connection for your Auth0 Application.
- Set up mappings (unnecessary for most cases).
- Test the connection.
Get the signing certificate from the IdP
With SAML Login, Auth0 acts as the service provider, so you will need to retrieve an X.509 signing certificate from the SAML IdP (in PEM or CER format); later, you will upload this to Auth0. The methods for retrieving this certificate vary, so please see your IdP’s documentation if you need additional assistance.Convert signing certificate to Base64
You can use the or the to upload the X.509 signing certificate. If you use the Management API, you must convert the file to Base64. To do this, either use a simple online tool or run the following command in Bash:cat signing-cert.crt | base64.
Assertion encryption
If your SAML assertions are encrypted, you must set additional values for your connection to tell Auth0 how to handle decryption.Create an enterprise connection in Auth0
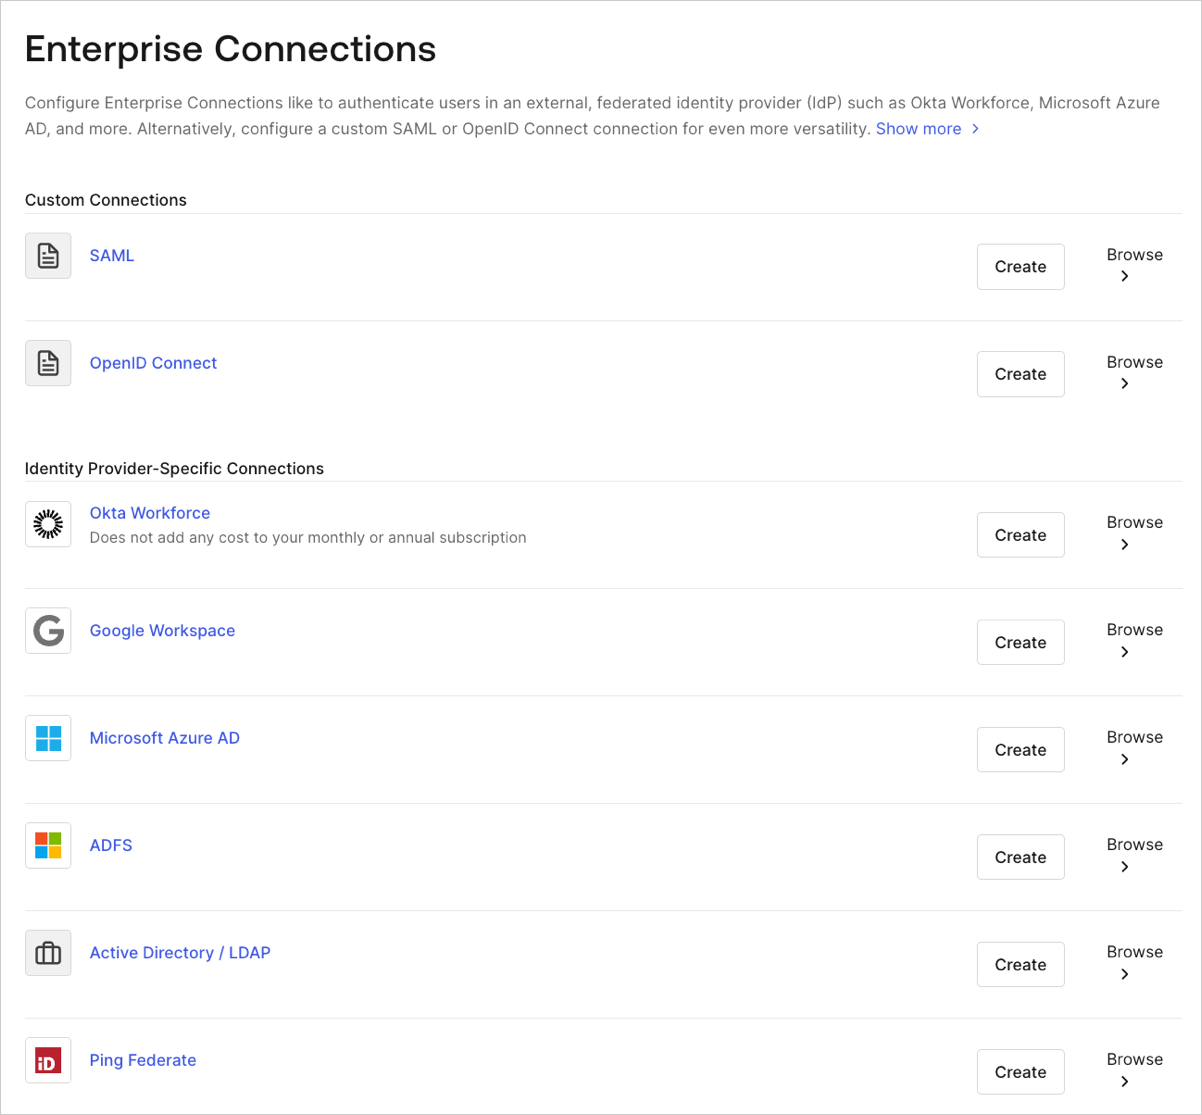
Next, you will need to create and configure a SAML Enterprise Connection in Auth0 and upload your X.509 signing certificate. This task can be performed using either Auth0’s Dashboard or Management API.Create an enterprise connection using the Dashboard
-
Navigate to Auth0 Dashboard > Authentication > Enterprise, locate SAML, and select its
+.
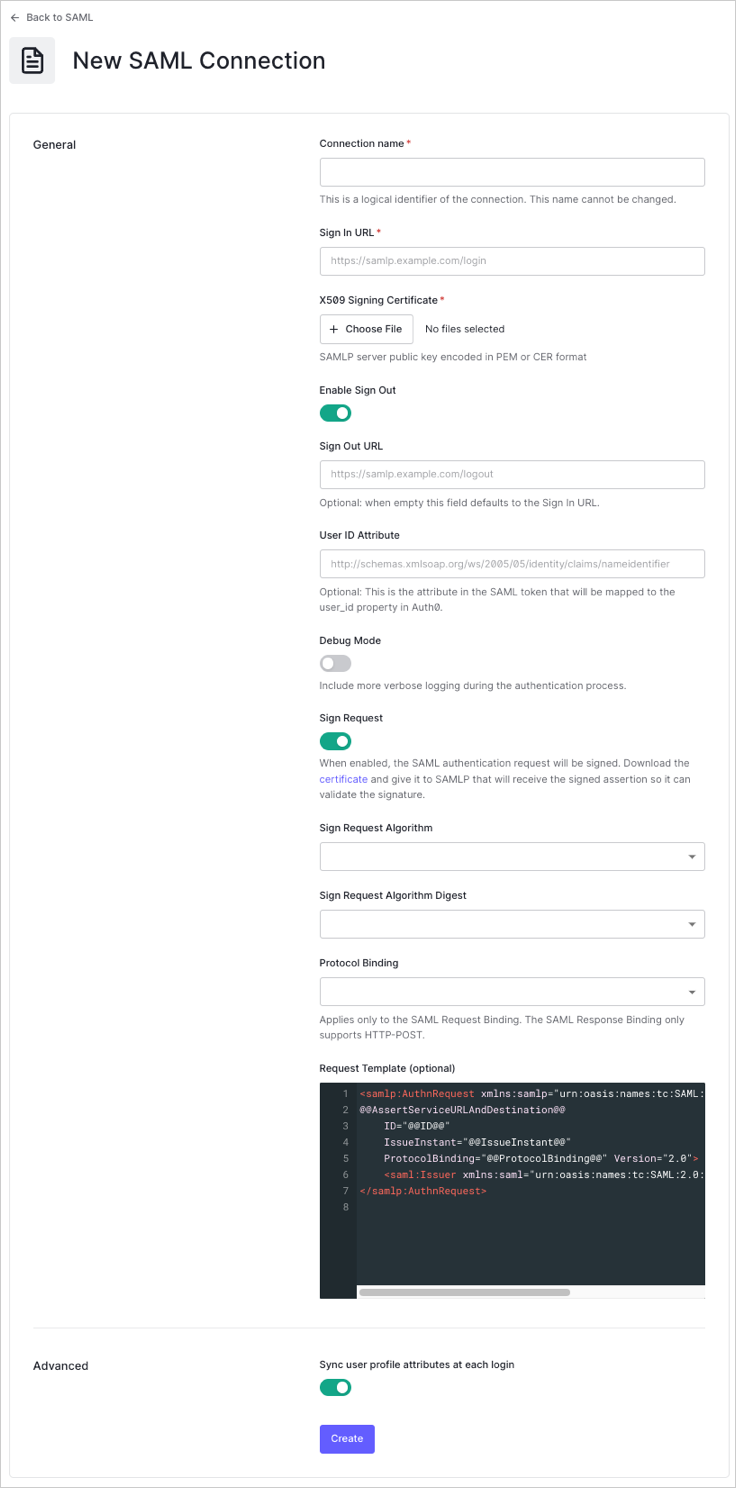
- Enter details for your connection, and select Create:
- In the Login Experience view, configure how users log in with this connection.
Optional fields are available with Universal Login only. Customers using Classic Login will not see the Add button, Button display name, or Button logo URL.
- If you have appropriate administrative permissions to complete the integration, click Continue to learn about the custom parameters needed to configure your IdP. Otherwise, provide the given URL to your administrator so that they can adjust the required settings.
Create an enterprise connection using the Management API
You can also use the Management API to create your SAML Connection. When doing so, you may choose to specify each SAML configuration field manually or else specify a SAML metadata document that contains the configuration values.Create a connection using specified values
Make aPOST call to the Create a Connection endpoint. Be sure to replace MGMT_API_ACCESS_TOKEN, CONNECTION_NAME, SIGN_IN_ENDPOINT_URL, SIGN_OUT_ENDPOINT_URL, and BASE64_SIGNING_CERT placeholder values with your Management API , connection name, sign in URL, sign out URL, and Base64-encoded signing certificate (in PEM or CER format), respectively.
Or, in JSON:
Create a connection using SAML metadata
Rather than specifying each SAML configuration field, you can specify a SAML metadata document that contains the configuration values. When specifying a SAML metadata document, you may provide either the XML content of the document (metadataXml) or the URL of the document (metadataUrl). When providing the URL, content is downloaded only once; the connection will not automatically reconfigure if the content of the URL changes in the future.
For SAML connections, Auth0 enforces a size limit of 4 MB on metadata discovery documents with the error SAML metadata document exceeded the maximum allowed size of 4 MB when this limit is exceeded.
Provide metadata document content
Use themetadataXml option to provide content of the document:
Provide a metadata document URL
Use themetadataUrl option to provide the URL of the document:
When providing the URL, content is downloaded only once; the connection will not automatically reconfigure if the content of the URL changes in the future.
Refresh existing connection information with metadata URL
This process will only work if the connection was created with
metadataUrl manually./api/v2/connections/CONNECTION_ID endpoint, passing a body containing {options: {metadataUrl: '$URL'}} where $URL is the same metadata URL with which you created the connection. You use the metadata URL to create a new temporary connection, then compare the properties of the old and new connections. If anything is different, update the new connection and then delete the temporary connection.
- Create SAML connection with
options.metadataUrl. The connection object will be populated with information from the metadata. - Update metadata content in the URL.
- Send a PATCH to the
/api/v2/connections/CONNECTION_IDendpoint with{options: {metadataUrl: '$URL'}}. Now the connection object is updated with the new metadata content.
Specify a custom Entity ID
To specify a custom Entity ID, use the Management API to override the defaulturn:auth0:YOUR_TENANT:YOUR_CONNECTION_NAME. Set the connection.options.entityID property when the connection is first created or by updating an existing connection.
The JSON example below can be used to create a new SAML connection using the SAML IdP’s metadata URL while also specifying a custom Entity ID. The Entity ID is still unique since it is created using the name of the connection.
Enable the enterprise connection for your Auth0 application
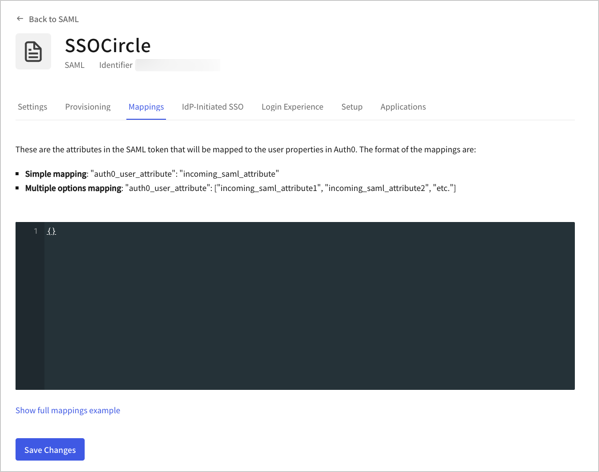
To use your new SAML enterprise connection, you must first enable the connection for your Auth0 Applications.Set up mappings
Select the Mappings view, enter mappings between the{}, and select Save.